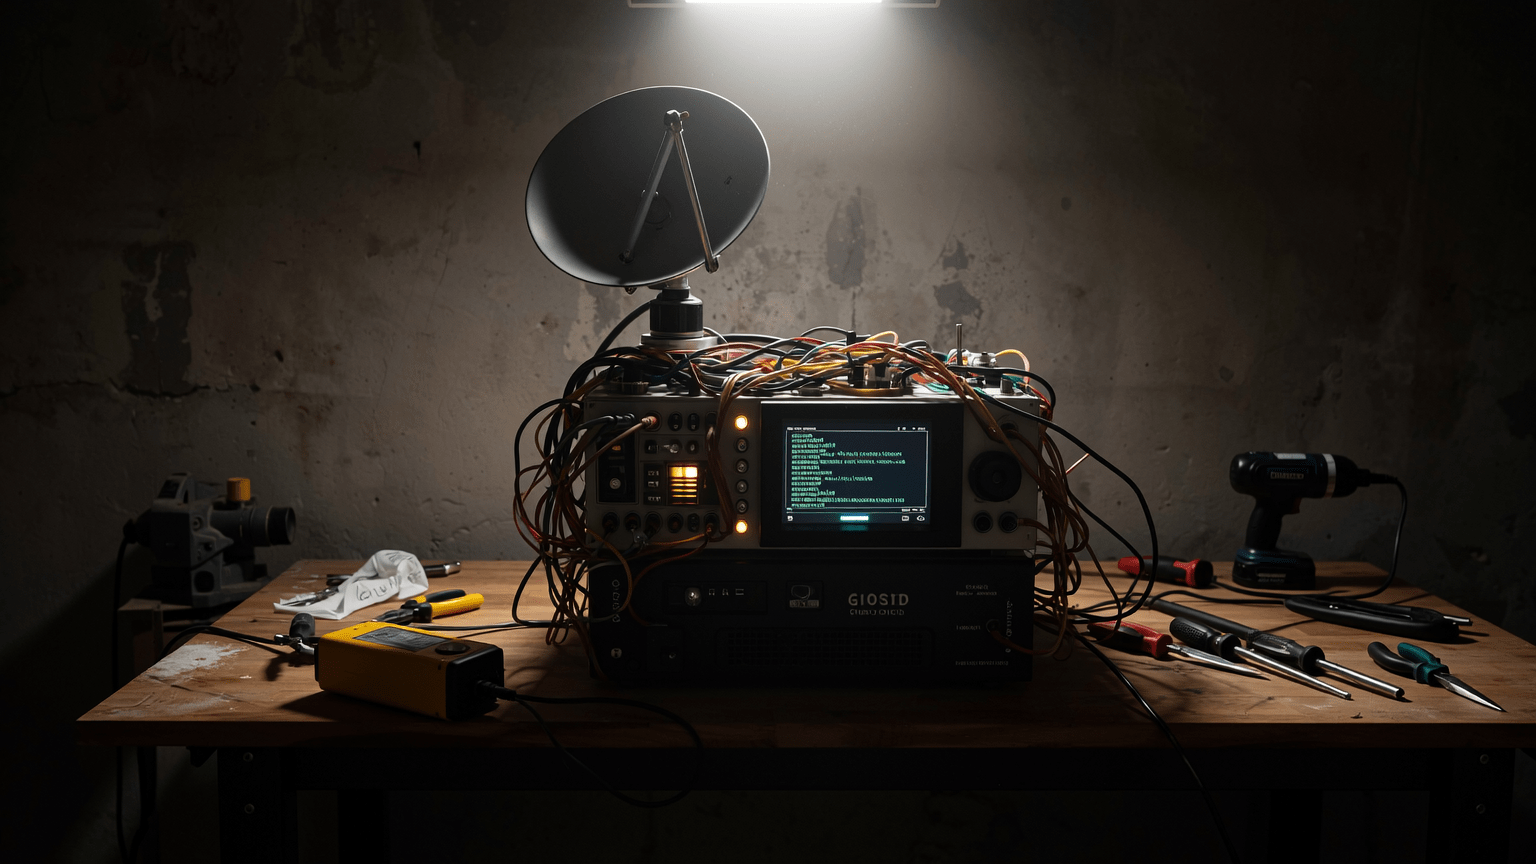
Meshstastic Off-Grid Com Systems 101
Video Intro
This is a short video intro about Meshtastic and this guide.
Preface
This guide represents my journey into the world of Meshtastic. As a novice myself, I’ve struggled to find a single, comprehensive resource that explains the core concepts and provides practical setup instructions.
This document is my attempt to bridge that gap, offering a beginner-friendly introduction to the power of mesh networking and off-grid communication.
While I believe the information here to be accurate, please remember that I’m still learning. Always refer to the official Meshtastic website and the documentation provided by the original equipment manufacturers (OEMs) as your primary sources of information.
My hope is that by sharing my experiences and insights, I can help others – especially those just starting out – while emphasizing the importance of consulting the official resources.
The Meshtastic Official Resources
NOTE: Always follow the OEM documentation and instructions provided!
The information and resources on the official Meshtastic are kept up to date and there are workflows, wizards, etc… specific to the setup and operation of these devices.
This should always be your first place to go for info and help, and all info on the official site supersedes anything in this book.
Introduction to Mesh Networking
Mesh networking creates a resilient, decentralized communication infrastructure where each device functions both as a transmitter and a relay. Unlike traditional networks that depend on centralized infrastructure such as cell towers or Wi-Fi access points, mesh networks operate independently, making them ideal for off-grid and emergency situations.
Why Mesh Networking?
- Decentralization: Eliminates single points of failure.
- Flexibility: Easily expand by adding more nodes and sensors.
- Resilience: Maintains connectivity even if some nodes go offline.
- Cost-Effective: No need for infrastructure investments.
- Longevity: Suitable for low-power, long-range communication.
- Security: Fully encrypted data with pre-shared keys (PKSs).
- Low Power Consumption: can be maintained on a small battery/solar cell.
Meshtastic Integration
Meshtastic leverages LoRa (Long Range) technology, enabling devices to communicate over long distances with minimal power. It is designed for simplicity, durability, and extended operational life in field conditions. Ranges of several kilometers are common, and can be extended with strategic node placement.

Example Use Cases
The flexibility of the Meshtastic system affords limitless possibilities for everyday use, but here are some hypothetical examples of where this communication protocol is critical:
Scouting/Camping Events
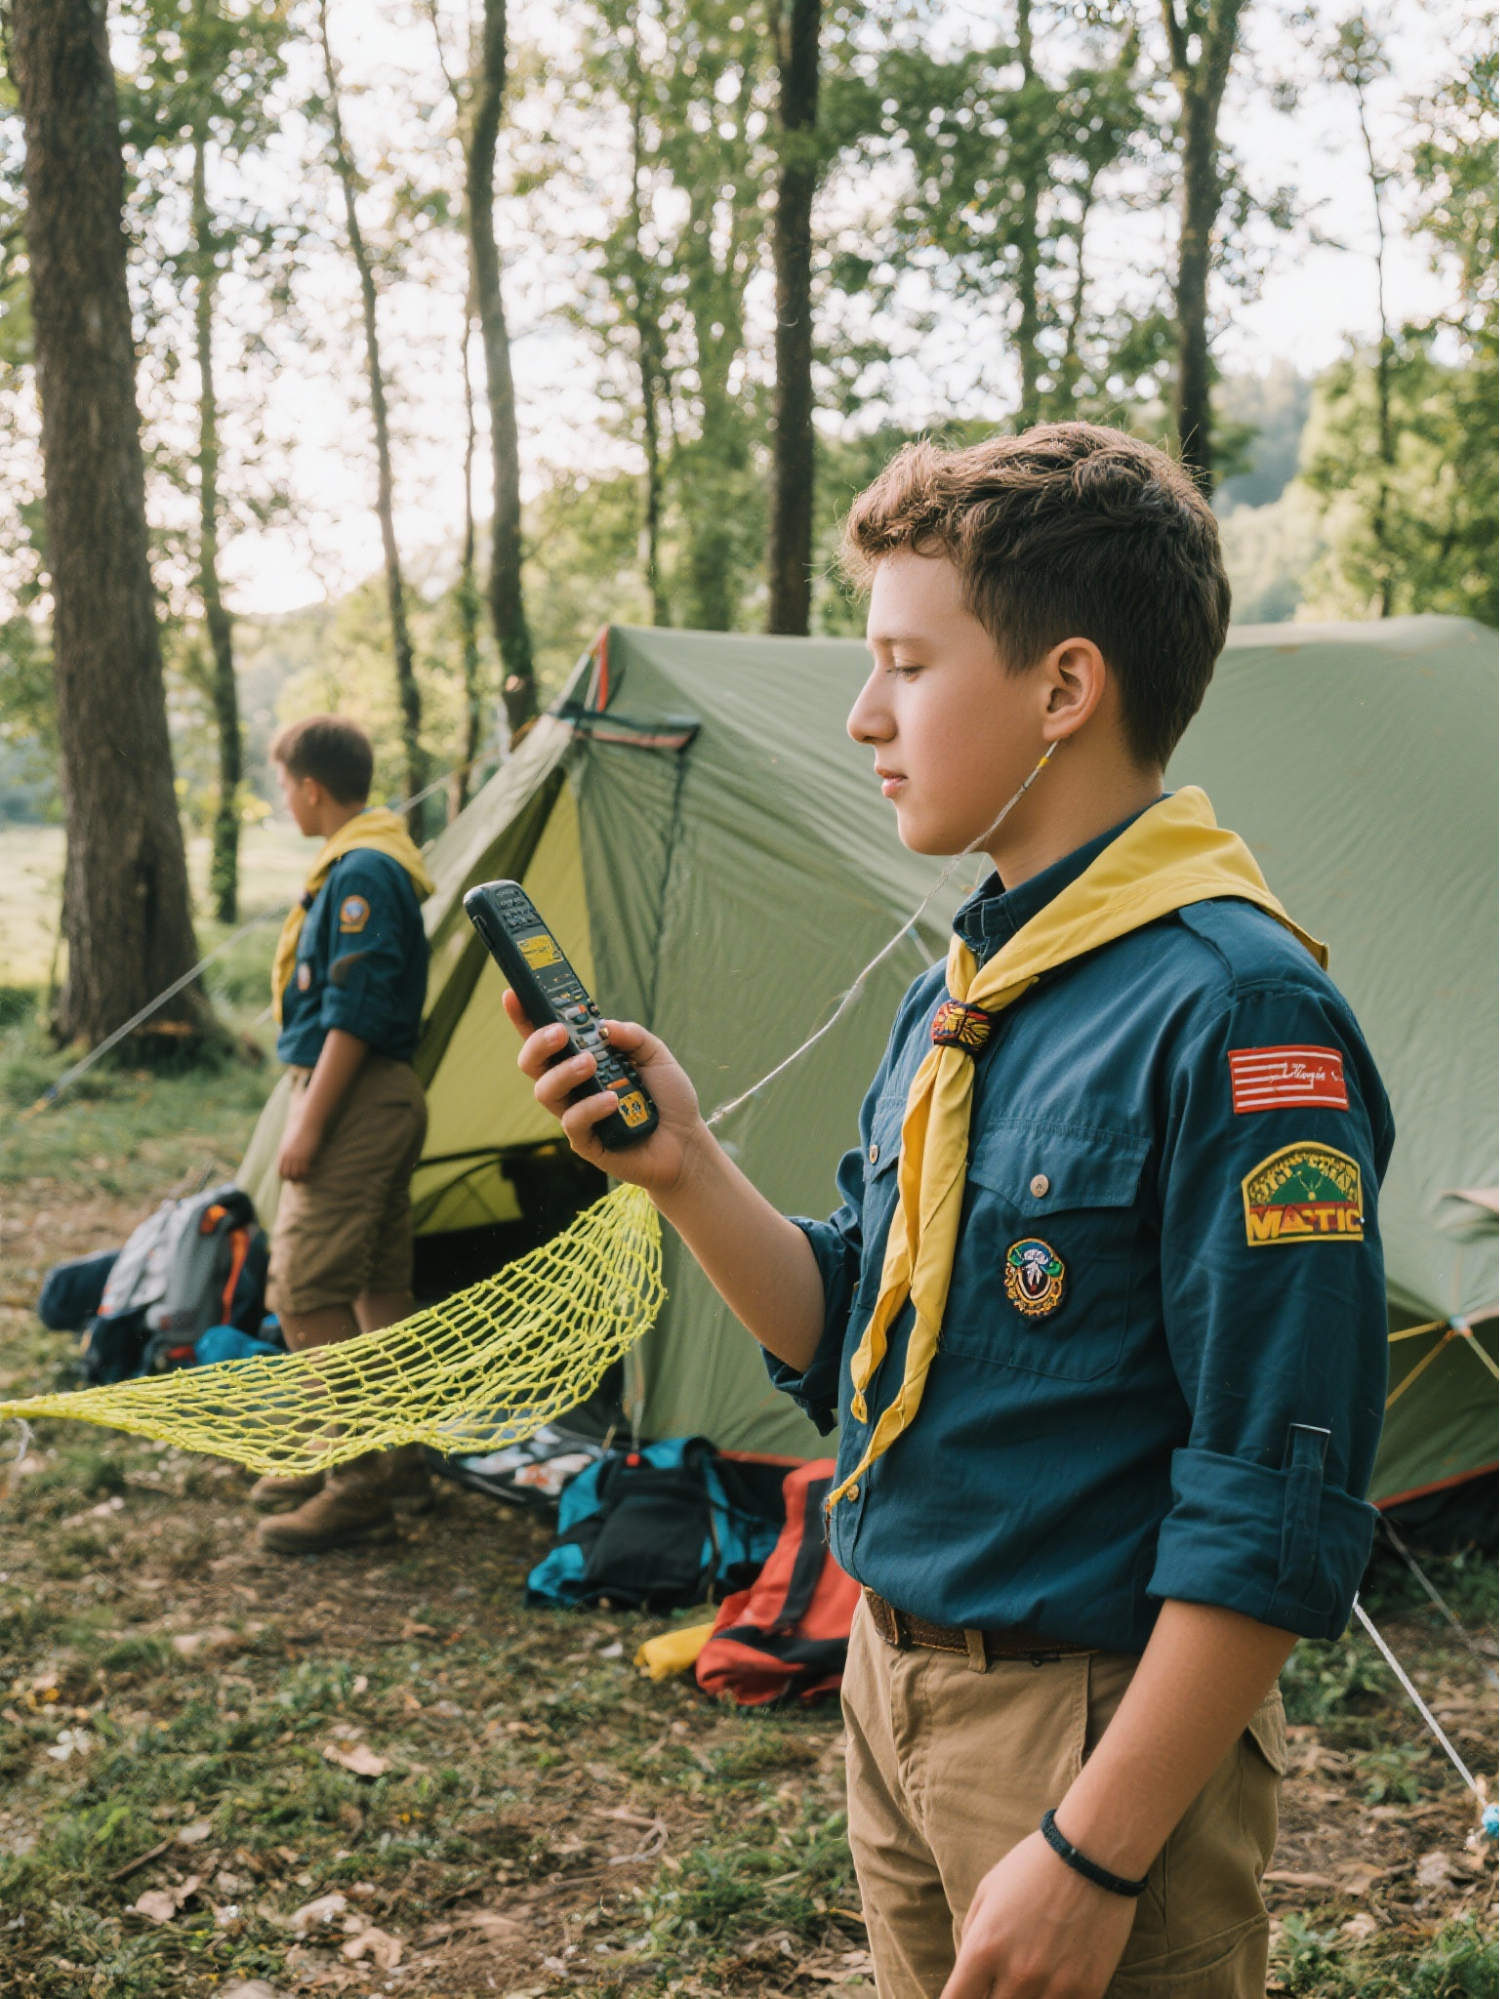 |
Scenario: A scout troop or group of friends goes on a camping trip to an area with limited or no cell service.
Meshtastic Use: They deploy Meshtastic devices to maintain communication between different groups exploring the area. This allows for location sharing, quick messaging for safety updates, and coordination of activities, even when spread out over a large area. |
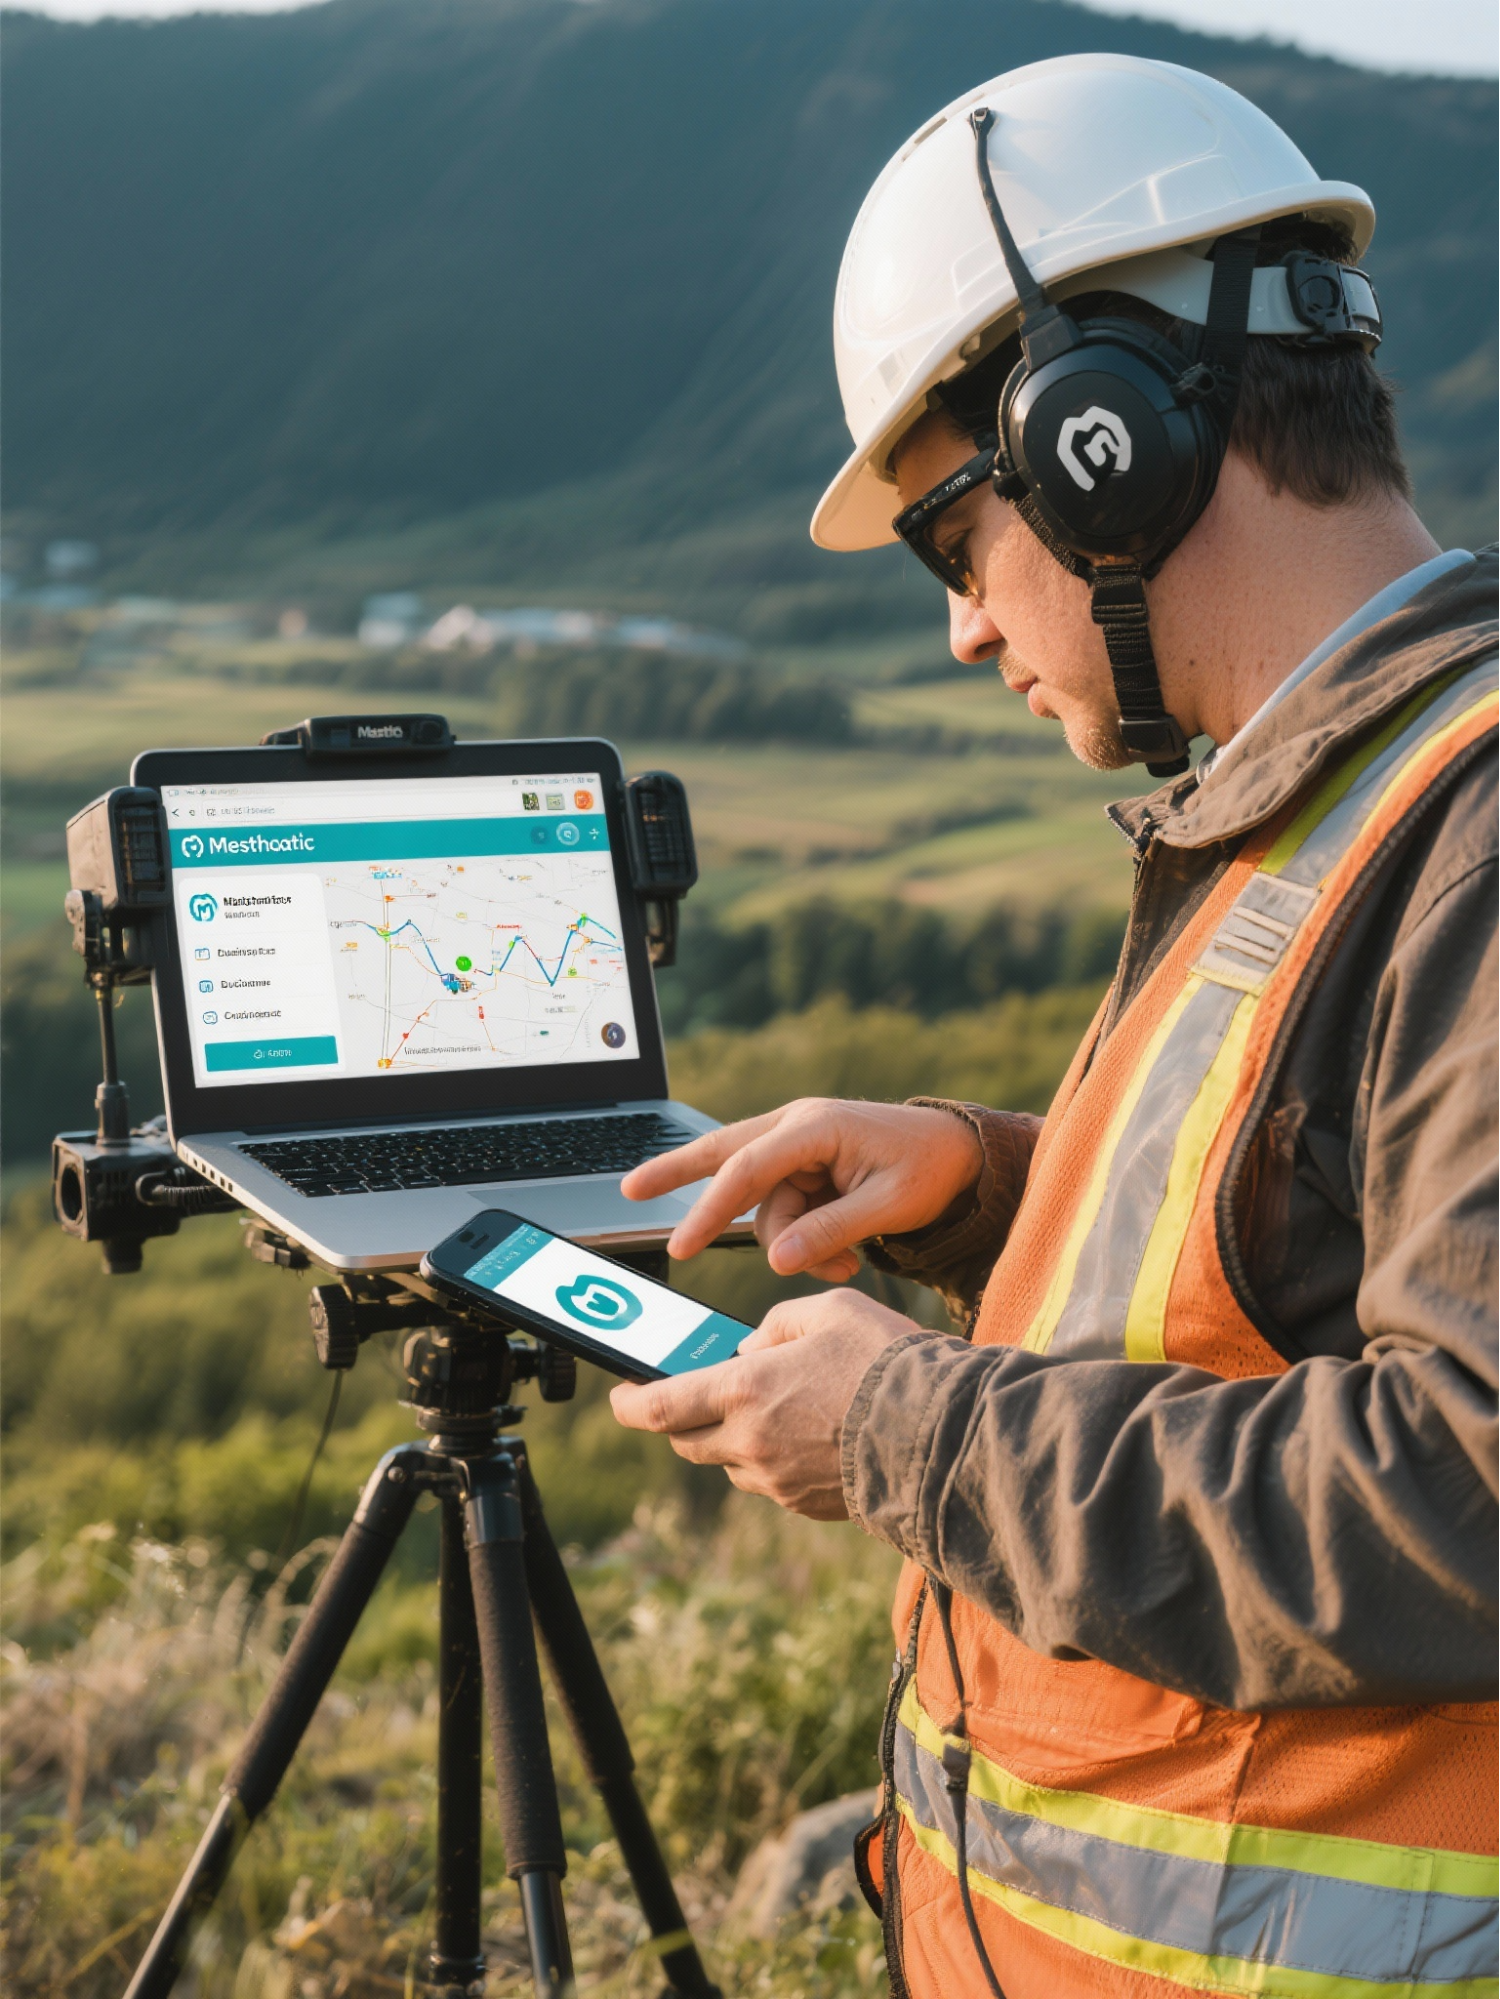
Critical Business Applications
| Scenario: A remote construction site or agricultural operation needs reliable communication in an area without cellular coverage.
Meshtastic Use: Workers use Meshtastic to coordinate tasks, report progress, and address any issues that arise. The ability to add sensors allows for remote monitoring of equipment or environmental conditions, improving efficiency and safety. The list of compatible sensors is huge. You can monitor pressure, strain, force, location, ph, temp, humidity, ground water levels, and so much more. |
 |
Internet/Power Outages
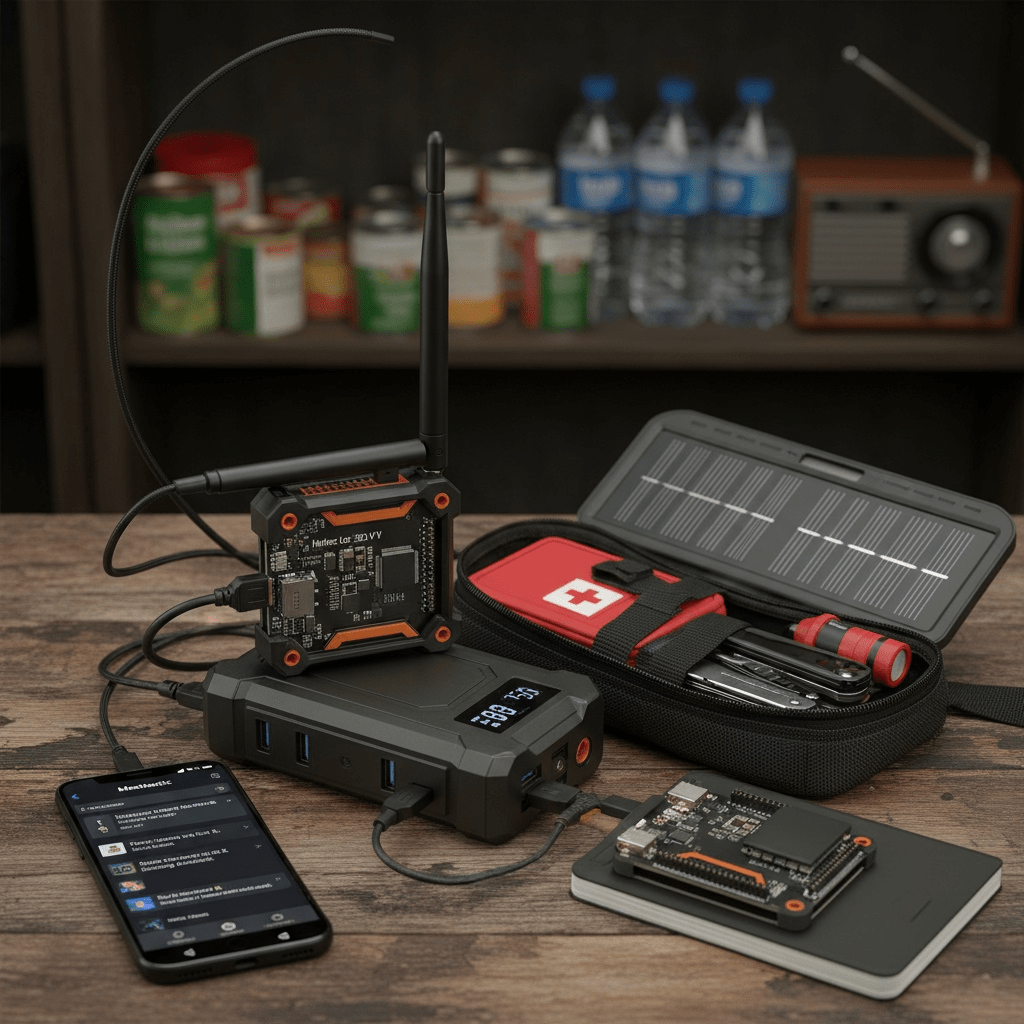 |
Scenario: A widespread internet and power outage affects a large city or region.
Meshtastic Use: Neighbors use Meshtastic to check on each other, share updates about the outage, and coordinate assistance for vulnerable individuals. It provides a localized communication network when external services are unavailable and can charge and run on solar. |
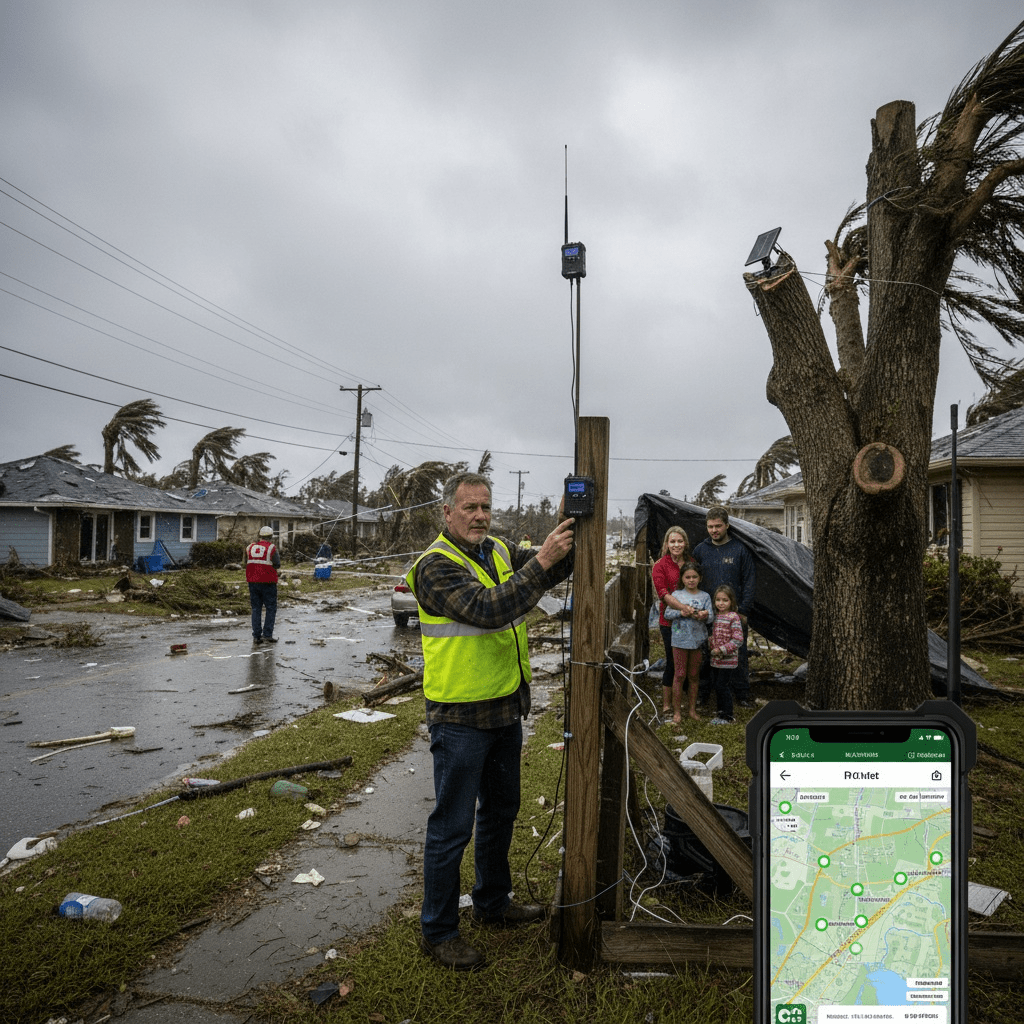
Natural Disasters
| Scenario: A hurricane or earthquake causes widespread damage, knocking out power and cellular infrastructure.
Meshtastic Use: Residents and emergency responders use Meshtastic devices to communicate when traditional channels are down to facilitate rescue operations, resource requests, and relays critical information about affected areas. The long-range capabilities and low power consumption make it ideal for prolonged use in such situations. |
 |
Civil Unrest
 |
Scenario: During a period of civil unrest, traditional communication channels become unreliable or are intentionally disrupted.
Meshtastic Use: Communities use Meshtastic to organize, share information about safe routes, and coordinate mutual aid efforts. Encrypted communication ensures privacy and security when sensitive information is shared. |
Other Uses
There are thousands of ways to apply these nifty devices so really the sky and your imagination are the limits.
Oh, by the way… Rumor has it that drug dealers, cartels, and ‘other organizations’ use this technology, and probably some governments too. More on that later.
Theoretical Foundations of Mesh Networking
NOTE: This could be a bit heavy for some, but it’s good to know as you move forward.
Core Concepts
- Nodes: Devices equipped with radio transceivers and configured to communicate with neighboring nodes.
- Multi-hop Routing: Data packets hop from node to node until reaching the destination, extending the network’s range.
- Self-Healing: When a node fails or moves, the network automatically reroutes data, maintaining connectivity.
- Ad hoc Architecture: Networks are dynamically formed without pre-existing infrastructure, adjusting as nodes change.
Protocols and Technologies
- Routing Protocols:
- AODV (Ad hoc On-Demand Distance Vector): Routes are established dynamically, on-demand when data needs transmission.
- OLSR (Optimized Link State Routing): Periodically exchanges routing information for more static networks.
- BATMAN (Better Approach for Mobile Ad-hoc Networks): Focuses on simplicity and efficiency.
- Frequency Bands:
- LoRa: Sub-GHz (915 MHz for USA): Longer range, lower data rates, lower power consumption.
- Wi-Fi/Bluetooth: 2.4 GHz: Higher data rates but shorter range.
- Modulation Techniques:
- FSK (Frequency Shift Keying): Common in many LoRa modules.
- LoRa (Long Range): Uses chirp spread spectrum modulation for extended range and robustness against interference.
Amateur Radio (HAM) and Meshtastic
Meshtastic can be used by both unlicensed people and licensed ham operators.
LoRa is used in the amateur radio bands, particularly on the 433 MHz (Europe & Asia) and 902~928 MHz (North America) ISM (Industrial, Scientific, & Medical) bands which are also designated for amateur radio use.
Amateur radio operators utilize LoRa for applications such as APRS (Automatic Packet Reporting System) and other low-bandwidth, long-range communication, although it is important to follow local regulations for spread-spectrum transmissions.
If you are a licensed amateur radio operator using Meshtastic devices on amateur radio frequencies, it is essential to comply with regulations regarding call sign identification. These regulations typically require that you transmit your call sign periodically during transmissions. FCC Part 97.119.A
If you choose to use your ham radio license with Meshtastic, consider both the privileges and restrictions:
| Privileges | Restrictions |
|
|
Implementation within Meshtastic:
Text Messages: Ensure your call sign is included in regular text messages sent via Meshtastic.
Packet Data: Explore the possibility of configuring your Meshtastic device to automatically include your call sign in packet data transmissions.
Voice Announcements (External): If using Meshtastic in conjunction with traditional amateur radio voice communications, verbally announce your call sign as required by regulations.
Minimum Interval: Be sure to publicly transmit your call sign at least once every 10 minutes, or more frequently if required by local regulations.
Hardware Selection and Recommendations
Core Components
- LoRa Transceivers: Modules such as those based on Semtech SX1276/78 chips. Choose modules supporting the required frequency band.
- Processing Units: Microcontrollers (e.g., Raspberry Pi Zero W, ESP32) to run mesh firmware.
- Power Supplies: Solar panels, rechargeable batteries, or portable power banks for field deployment.
- Antennas: Higher quality/ hi-gain antennas (e.g., Yagi, dipole) for increased range; omnidirectional for general coverage. This is covered in more detail in the Effective Usage – Antenna Choice section.
- Enclosures: Waterproof, dustproof enclosures (e.g., IP67-rated boxes) for outdoor durability as well as mobile handhelds with various screens and human input devices.
Important Information
- The devices MUSThave the antenna attached while powered on, otherwise damage to the RF section could occur.
- Some USB-C cellphone chargers have been reported to overcharge some devices, be sure to use the recommended power source(s).
- In most cases, you will run your device as a node (default) even if you want to make it a solar ‘repeater’, etc.… it can still be set up to TX/RX packets in the node.
- ESP32 based devices like Heltec v3, etc… consume considerably more power and have lower performance than the RAKwireless based devices.
Supported Devices
You can find a maintained list of supported devices on the Meshtastic site with links and more:
Devices | Supported Hardware Overview | Meshtastic
Popular Hardware Options
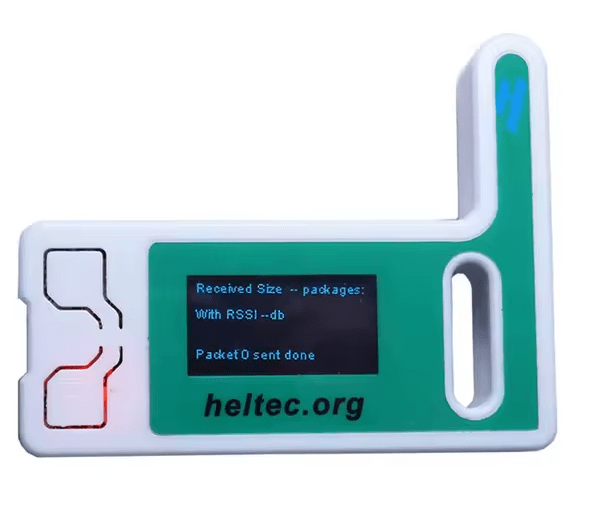
I first started with a pair of Heltec v3’s. If you want to start but not go all out just yet, this is a solid bet.
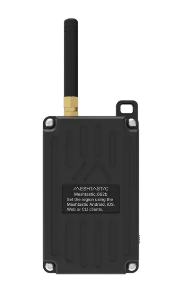
Handheld/Mobile Devices
There are handhelds with minimal ‘stand-alone’ functionality and are designed to be used with an app/computer via Wi-Fi, Bluetooth, or USB serial connection.
Mobile Device Examples
|
Heltec V3 |
RAK WisMesh
Pocket V2 |
Lilygo
T-Watch |
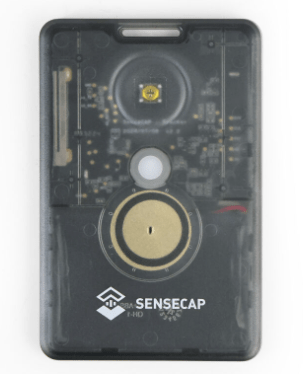
SenseCAP T-1000E |
 |
 |
 |
 |
And there are handhelds with displays (both LCD and e-paper), keyboards, trackballs, etc.… (like a blackberry) for an all-in-one solution.
|
Lilygo T-Deck |
Lilygo
T-Lora Pager |
Lilygo
T-Deck Plus |
Lilygo T-Desk Pro |
 |
 |
 |
 |
Stationary Devices
NOTE: If you are going to place nodes and leave them unattended, DO NOT add your PSK encrypted channel(s). Your PSK can be discovered and even changed from the device! You can still let them pass encrypted messages, you don’t need ‘your channels’ programmed in a node used in this way.
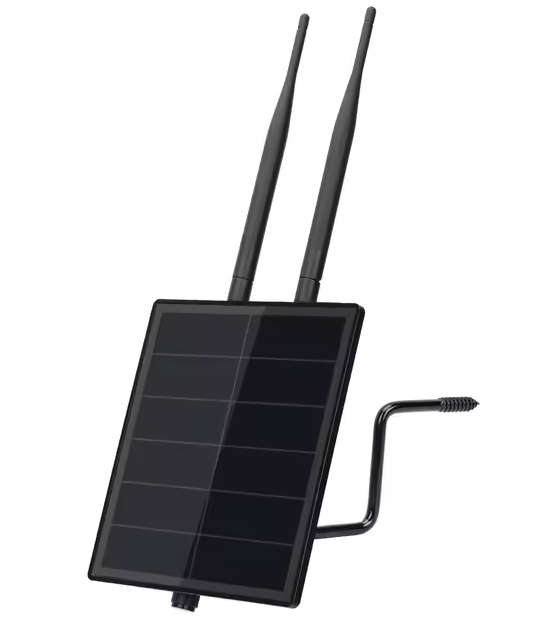
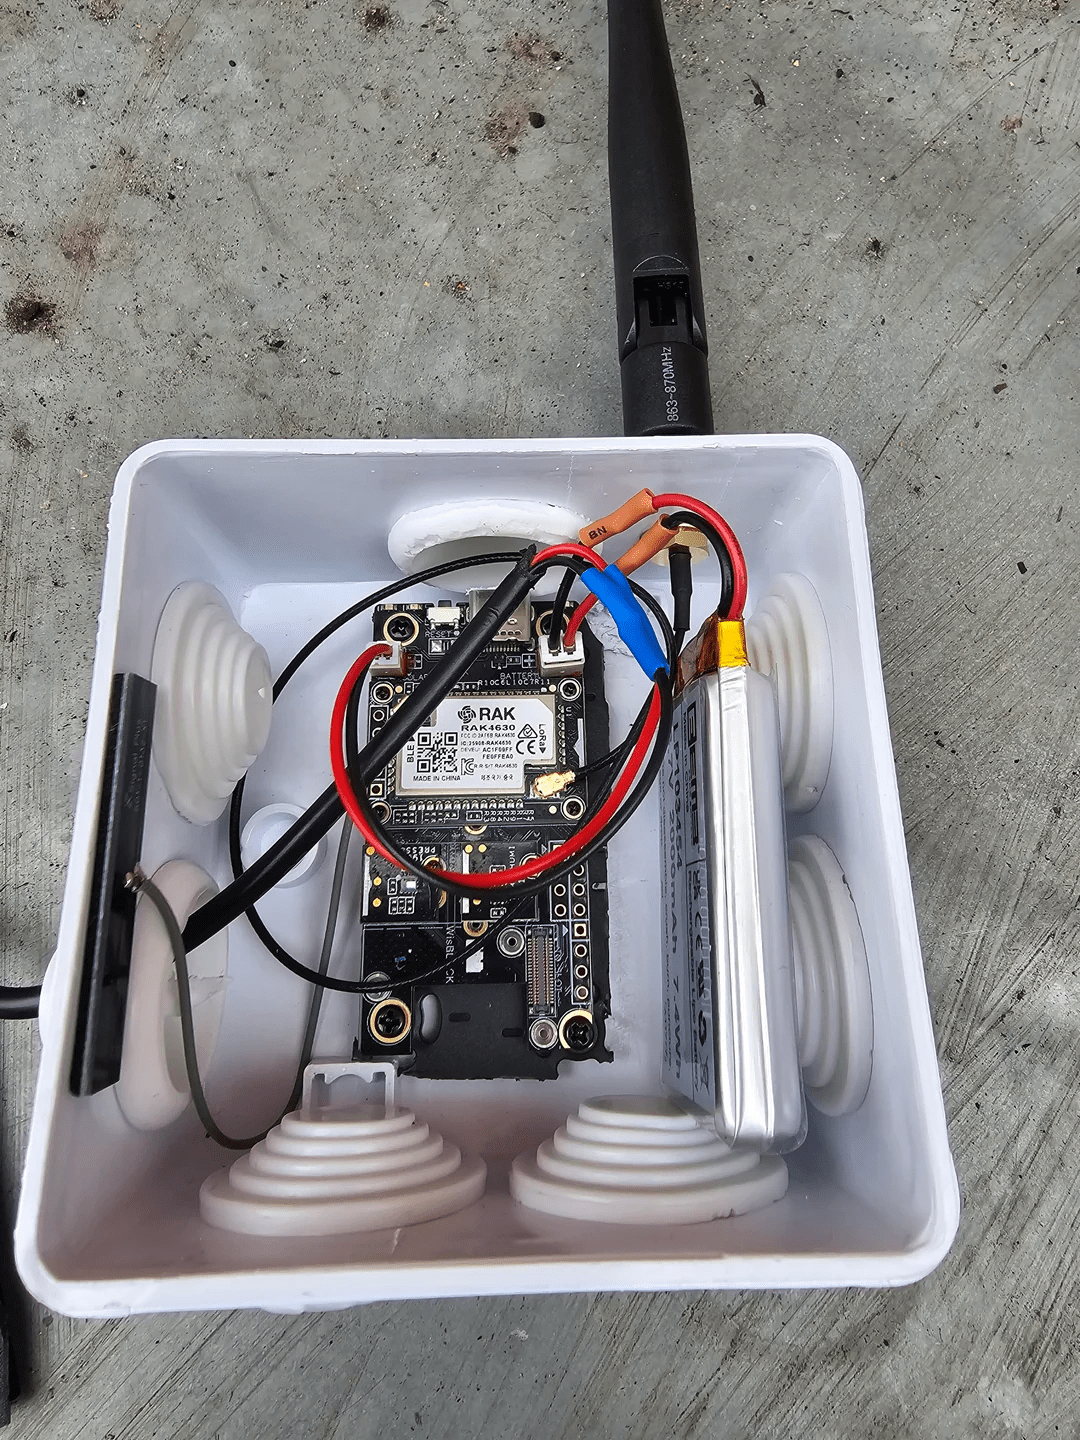
These nodes can be permanent, semi-permanent, and even portable for use wherever you go, so we use the word stationary loosely here. These are strategically placed as high as possible as line of sight is important. Stationary devices will typically be the devices you mount on a roof, in a tree, on a wall, pole, tripod, etc.… primarily to provide a constant node in proximity to your area.
And you can put solar, outdoor rated nodes ‘in the wild’ to create a larger. Applications could range from camping and hiking to neighborhood watches, to events, groups, and clubs.
These can function as repeaters or nodes also, but keep in mind setting up as a repeater/router is typically for very specific reasons. The function(s) most situations require of these devices can be had using the device as a ‘standard’ node and configuring it properly.
For those very specific reasons (‘organizations’ using the devices for nefarious or criminal activity, for instance???)…. That’s when you use ghost nodes.
Stationary Device Examples
|
KEEPTEEN D5 Solar Lora Node |
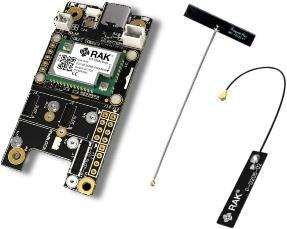
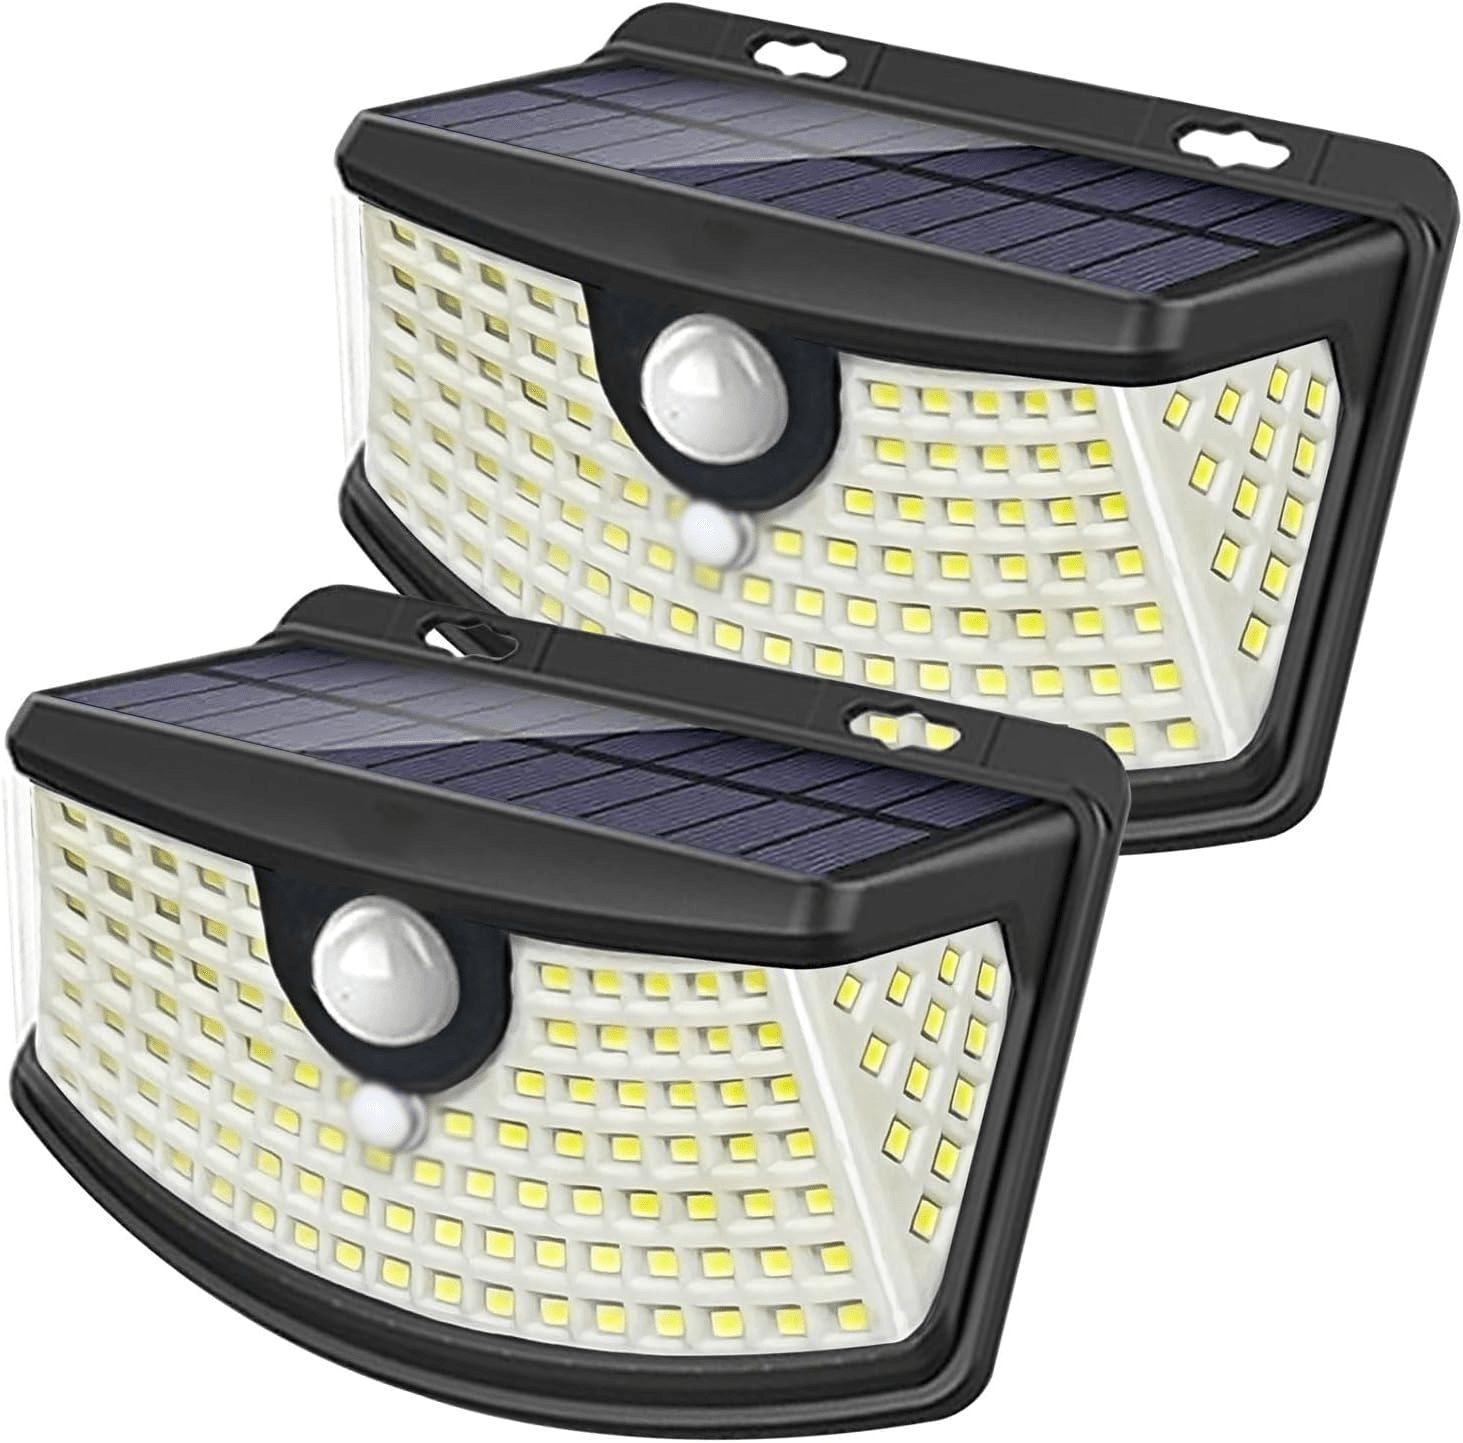
RAKwireless WisBlock Kit | Modified Outdoor Solar Lights | DIY Outdoor Enclosure |
 |
 |
 |
 |
RAKwireless WisBlock vs. ESP32
The ESP32 devices like the Heltec V3 are cost-effective and capable, and are better for client nodes and pocket devices that you can easily access,charge, and/or power.. The RAKwireless WisBlock is much more robust and uses considerably less power than the ESP23 devices so it is well suited for remote solar stationary devices set up as repeaters (or routers).
| Rakwireless vs. Heltec V3: Performance and reliability comparison | ||
| Rakwireless (e.g., WisBlock Series) | Heltec V3 (e.g., WiFi LoRa 32 V3) | |
| Primary Use | Professional, low-power, and fixed installations (e.g., solar-powered repeaters). | Hobbyist tinkering, mobile nodes, and prototyping. |
| Power Consumption | Superior. Boards with the nRF52 chip are exceptionally power-efficient, ideal for battery-powered or solar setups. | High. The ESP32-S3 chip is power-hungry, leading to poor battery life. A 1500mAh battery may only last 10–15 hours. |
| Reliability | Excellent. Designed for industrial-strength, long-term deployment with high-quality components. | Variable. Built for development, not long-term reliability. Some users report issues like failed USB-C circuits. |
| Modularity | Highly Modular. The WisBlock system uses a “snap-together” approach for cores, bases, and sensors, offering extensive customization. | Integrated. A single, all-in-one board. Customization requires more advanced tinkering, such as soldering external components. |
| Radio Performance | High Sensitivity. RAK boards, such as the RAK4631, are noted for having better receive sensitivity. | Mixed. Some users report excellent range, but the stock antenna is poor and often requires an upgrade for optimal performance. |
| Ease of Use | Flexible. While powerful, the modular system can have a steeper learning curve for beginners working on simple projects. | Great for beginners. The built-in OLED screen and simple design make it easy to start with for experimentation. |
| Durability | Industrial-Grade. Designed for stability and durability in demanding conditions. | Consumer-Grade. Less durable; some components may fail after repeated use. |
| Cost | Generally more expensive, reflecting the professional-grade components and design. | Less expensive, making it a cheaper option for initial development and replacement. |
| Community Support | Good support, but smaller than Heltec due to a smaller user base. | Extensive. A large community provides ample resources and support. |
Meshtastic Firmware
Meshtastic firmware is open-source and specifically designed for LoRa-based mesh networking. It enables easy deployment, configuration, and management of the mesh network.
Features:
- Plug-and-play installation on supported hardware.
- Easy configuration via web interfaces or command-line tools.
- Support for encrypted communication for security.
- Built-in firmware updates for improvements and patches.
Supporting Software:
- Mobile Apps: Available for Android and iOS, allowing users to monitor network status, send messages, and visualize node locations.
- Desktop Tools: Command-line utilities and web dashboards for advanced configuration and diagnostics.
- Custom Scripts: For automating routines such as node health checks, firmware updates, or data logging.
Software Options and Configuration
Device Roles
The basic roles we will cover here are CLIENT_MUTE and REPEATER. Here is the full list of device roles:
| Device Role | Description | Best Uses |
| CLIENT | App connected or stand alone messaging device. Rebroadcasts packets when no other node has done so. | General use for individuals needing to communicate over the Meshtastic network with support for client applications. |
| CLIENT_MUTE | Device that does not forward packets from other devices. | Situations where a device needs to participate in the network without assisting in packet routing, reducing network load. |
| CLIENT_HIDDEN | Device that only broadcasts as needed for stealth or power savings. | Use in stealth/hidden deployments or to reduce airtime/power consumption while still participating in the network. |
| TRACKER | Broadcasts GPS position packets as priority. | Tracking the location of individuals or assets, especially in scenarios where timely and efficient location updates are critical. |
| LOST_AND_FOUND | Broadcasts location as message to default channel regularly to assist with device recovery. | Used for recovery efforts of a lost device. |
| SENSOR | Broadcasts telemetry packets as priority. | Deploying in scenarios where gathering environmental or other sensor data is crucial, with efficient power usage and frequent updates. |
| TAK | Optimized for ATAK system communication, reduces routine broadcasts. | Integration with ATAK systems (via the Meshtastic ATAK Plugin) for communication in tactical or coordinated operations. |
| TAK_TRACKER | Enables automatic TAK PLI broadcasts and reduces routine broadcasts. | Standalone PLI integration with ATAK systems for communication in tactical or coordinated operations. |
| REPEATER | Infrastructure node for extending network coverage by always rebroadcasting packets once with minimal overhead. Not visible in Nodes list. | Best positioned in strategic locations to maximize the network’s overall coverage. The device is not shown in topology. |
| ROUTER | Infrastructure node for extending network coverage by always rebroadcasting packets once. Visible in Nodes list. | Best positioned in strategic locations to maximize the network’s overall coverage. The device is shown in topology. |
| ROUTER_LATE | Infrastructure node that always rebroadcasts packets once but only after all other modes, ensuring additional coverage for local clusters. Visible in Nodes list. | Ideal for covering dead spots or ensuring reliability for a cluster of nodes where placement doesn’t benefit the broader mesh. The device is shown in topology. |
Node Configuration
You can select the way you intend to use the device. Generally handhelds, mobiles, etc… are clients. Your modded solar light on the top of the house would probably be a repeater, etc …
Client Node
App connected or stand alone messaging device. Rebroadcasts packets when no other node has done so.
Repeater Node
Infrastructure node for extending network coverage by always rebroadcasting packets once with minimal overhead. Not visible in Nodes list.
Router Node
Infrastructure node for extending network coverage by always rebroadcasting packets once. Visible in Nodes list.
Ghost Node
To “ghost” a node, you typically want to deploy it without a visible user interface and potentially with a stealthier design. This involves setting it up in a hidden location, like a tree, disabling features that provide visual feedback, and configuring the device to serve as a hidden router or repeater, which only relays packets without originating messages itself.
Tips For Effective Usage
Optimal Placement
Node placement is crucial for maximizing network range and connectivity. Elevating your Meshtastic nodes on towers, trees, or poles can significantly improve line-of-sight communication, reducing obstacles and extending the effective range.
Consider the surrounding terrain and potential obstructions (buildings, hills, dense foliage) when selecting node locations. Aim for a clear path between nodes, especially in densely populated areas.
Experiment with different heights to find the optimal balance between range and signal strength. Also consider setting up a test node for further testing.
Antenna Choice
Selecting the right antenna is critical for optimizing Meshtastic performance. The gain is important, as is the intended use case, when choosing the proper antenna.
Omnidirectional antennas broadcast signals in all directions, providing broad coverage for general use. They are ideal for mobile nodes and situations where connectivity is needed in multiple directions.
Directional antennas (e.g., Yagi, dish) focus the signal in a specific direction, increasing range and signal strength. These are best suited for fixed nodes or creating point-to-point links.
Consider the trade-offs between coverage area and signal gain when choosing an antenna. A higher-gain antenna can extend range, but requires careful aiming.
Power Management
Maintaining a reliable power supply is essential for uninterrupted Meshtastic operation, especially in off-grid environments. Incorporating solar panels coupled with rechargeable batteries allows nodes to operate autonomously for extended periods.
Choose solar panels with sufficient wattage to charge the batteries effectively, even in less-than-ideal sunlight conditions. Size the battery capacity to meet the node’s power consumption needs, considering factors like transmit power, duty cycle, and environmental conditions.
Firmware Updates
The Meshtastic firmware is constantly evolving, with new features, bug fixes, and performance improvements being released regularly. Regularly checking for and installing firmware updates is crucial for ensuring optimal performance, security, and compatibility with other nodes.
The Flashing Firmware article in the Basic Setup Overview – Firmware Installation section provides detailed instructions on how to update your devices. Pay attention to release notes, which often highlight important changes and potential compatibility issues.More on flashing firmware in the section.
Network Security
Protecting your Meshtastic network from unauthorized access is paramount. Enabling encryption ensures that your communications remain private and secure. Use unique IDs for each node to prevent spoofing and identify devices on the network.
Implement access controls to restrict who can join your network and what information they can access. Regularly review and update your security settings to adapt to evolving threats.
Redundancy
Building a resilient Meshtastic network requires redundancy. Deploying additional nodes to fill potential gaps in coverage ensures that connectivity remains even if some nodes fail or experience temporary disruptions.
Consider strategically placing redundant nodes in areas where signal strength is weak or where obstructions are likely. Distribute nodes across diverse power sources and geographic locations to minimize the impact of localized outages. Use of solar and ‘Ghost Nodes’ can also aid in overall system robustness.
Maintenance
Regular maintenance is key to ensuring the long-term reliability and performance of your Meshtastic network. Periodically inspect hardware for damage or wear, especially antennas, connectors, and power supplies.
Clean antennas to remove dirt and debris that can degrade signal strength. Replace batteries as needed to maintain optimal power performance. Regularly check the mesh for new nodes that may be unsecure and/or have not been properly tested.
Checking battery health and cleaning solar panels is crucial for long-term performance. Consider also getting a USB voltage detector for measuring the amount of power drawn and whether or not any of the charging is ‘trickle’ charging.
Basic Setup Overview
This is covered step-by-step and in great detail on the meshtastic.com site. Here are the basics.
Hardware Assembly As Required
- Mount the LoRa module onto your processing unit, ensuring correct orientation, if applicable.
- Connect an antenna to the LoRa transceiver. Use high-gain antennas for longer ranges.
- Power your device with a suitable power source—solar, batteries, or mains, depending on deployment.
- Secure the hardware in a weatherproof enclosure for outdoor environments, if applicable.
- Verify hardware functionality by powering on and checking status LEDs or logs.
Firmware Installation
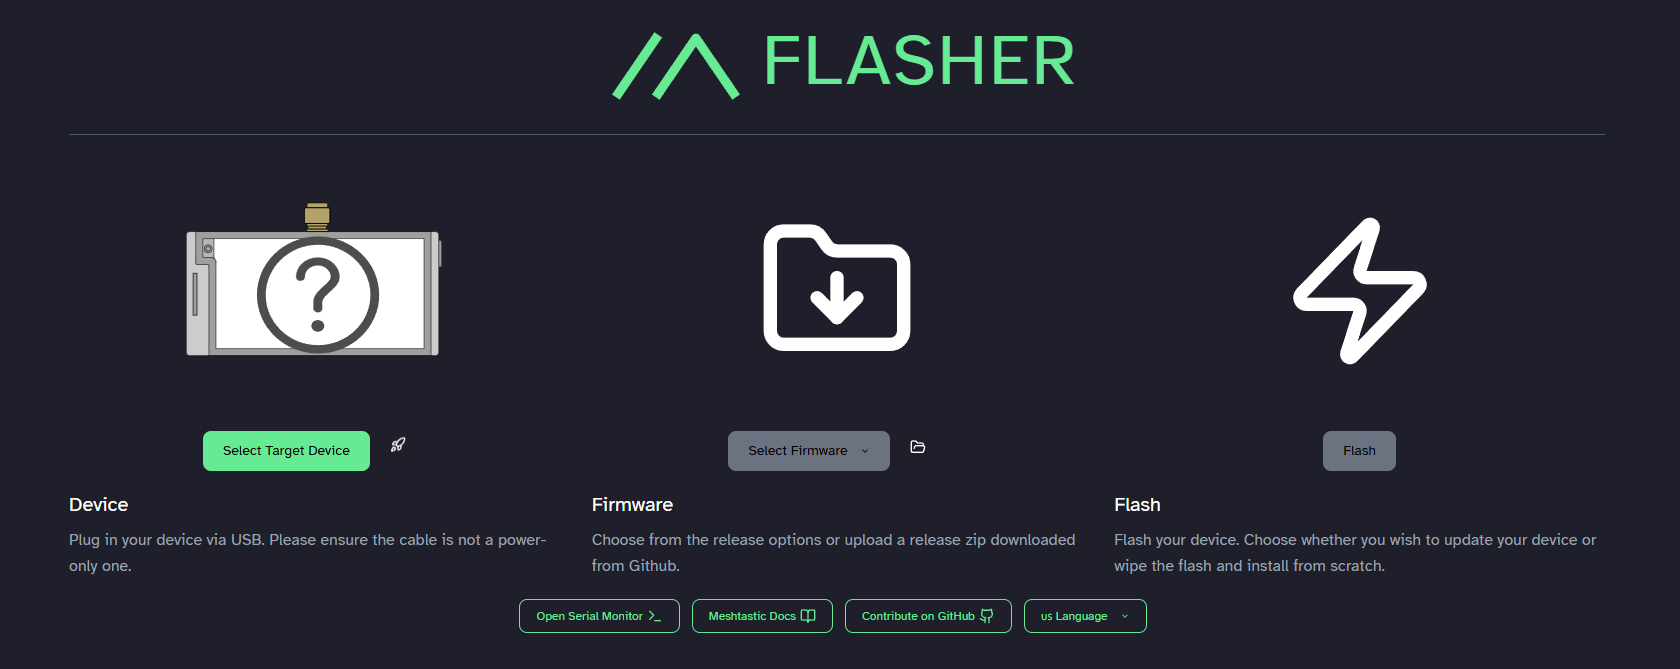
- Flash the correct firmware using the web flasher (browser based and platform independent) or download and manually install it.
- Configure the device’s network settings:
- Set the radio frequency (regional band compliance).
- Assign unique IDs to each node.
- Enable encryption and other security features.
- Save the configuration and reboot the device.
Network Deployment and Testing
- Place nodes at strategic locations to maximize coverage—prefer elevated or open areas.
- Power on all nodes and ensure they boot correctly.
- Monitor connectivity using mobile apps or dashboard interfaces.
- Send test messages or perform ping tests to verify communication paths.
- Adjust antenna orientation if necessary to improve range or signal quality.
Set Up Heltec v3 as Client
NOTE: In the USA, Meshtastic devices typically operate on the 915 MHz ISM band. It is important to comply with local regulations regarding power output and usage.
Step 1: Install the latest Meshtastic Firmware
- Connect the Heltec V3: Connect the Heltec V3 to your computer using the USB-C cable.
- Use the Web Flasher:
- Open a web browser (Chrome, Edge, etc.) and go to the Meshtastic Web Flasher: https://flasher.meshtastic.org/
- Follow the on-screen prompts to connect to your device via WebSerial. You will likely need to install or update drivers if this is the first time using the Web Flasher.
- Select the correct firmware: Look for the firmware version specifically designated for the USA region (“US 915”). Choosing the wrong region will cause a variety of communication problems.
- Click “Flash” and wait for the process to complete. The Web Flasher will also erase and fully reinstall the firmware.
- The device will re-boot after it completes.
Step 2: Configure the Heltec V3
- Install the Meshtastic App: Download and install the Meshtastic app on your Android or iOS device from the app store.
- Enable Bluetooth: Make sure Bluetooth is enabled on your mobile device.
- Open the Meshtastic App: Launch the Meshtastic app.
- Connect to the Device: The app should automatically detect your Heltec V3. If not, tap the “+” icon and select your device from the list.
- Configure Node Settings:
- The app will guide you through the initial setup. You can set a device name (e.g., “My V3,” “Backpack”), assign a location (optional), and configure other basic settings.
- For a client node, you can leave the default settings for most parameters.
- If you want to communicate with a specific group, set a channel (or create a new one).
- If this is a test, or you do not want to broadcast a location, turn this off.
- In most cases, a “Client” node will be a “Client_Mute” or “Client_Hidden” if you are setting up permanent unattended devices.
- Set Region: Under the Settings tab, confirm that the region is set to “US (915 MHz)”. This is essential for proper operation.
- Configure Long Name: Use the documentation on the meshtastic website to set up a longer name for the device.
Step 3: Test the Connection
- Send a Message: Use the Meshtastic app to send a test message to another node on your network.
- Verify Reception: Confirm that the message is received by the other node.
- Check Node Status: Use the Meshtastic app to view the status of your Heltec V3, including signal strength, battery level (if applicable), and connected nodes.
Step 4: Finalizing Your Set-up
- Encryption: Ensure the security of your mesh. Create long and unique passwords for each node. Keep them stored in a safe place.
- Location settings: Test the location services before permanently deploying it.
Tips and Troubleshooting (USA Specific):
- Frequency Conflicts: It is crucial to ensure all your devices are set to the “US (915 MHz)” region in the Meshtastic app.
- Operating Power: USA allows more operating power to be broadcast.
- Legal Compliance: When operating on HAM frequencies always abide by the HAM radio regulations.
- Connection Issues: If the app can’t find your Heltec V3, try restarting Bluetooth, the app, and the device. If using on a metal surface, this can negatively effect bluetooth strength and detection.
- Firmware Updates: Always keep your firmware updated to the newest supported version.
- Official Documentation: Consult the Meshtastic website (https://meshtastic.org/) and the Heltec documentation for more detailed information and troubleshooting tips.
- Power: Ensure that the device has enough power.
Set Up RAKwireless WisBlock Repeater
Prerequisites:
- Heltec V3 LoRa Device: This is the primary device you’ll be configuring as a client.
- Antenna (Suitable for 915MHz if in USA): Ensure you have an antenna compatible with the V3’s LoRa module for transmitting and receiving signals. A small whip antenna is a common starting point.
- USB-C Cable: Used to connect the Heltec V3 to your computer for firmware flashing and initial configuration (if needed).
- Meshtastic Firmware (Latest Stable Version): The firmware that enables Meshtastic functionality on the Heltec V3.
- Meshtastic Mobile App (Android or iOS): Used to configure the device, send messages, and monitor network status.
- USB Drivers (If Required): Your computer might need specific drivers to recognize the Heltec V3’s USB connection. The Web Flasher can usually manage this.
- Computer (Windows, macOS, or Linux): Needed for flashing the firmware and potentially advanced configuration.
- Mobile Device (Android or iOS): Required for the Meshtastic app and basic configuration.
- Internet Connection: Needed to download firmware, the app, and access online resources.
Another Meshtastic Device (Optional, but Recommended): To test communication and verify that your client node is functioning correctly.
Step 1: Assemble the WisBlock
- Mount Core Module: Carefully attach the RAK4631 core module to the RAK5005-O base board. Ensure it clicks securely into place.
- Mount LoRa Module: Attach the RAK3172 LoRa module to the base board, ensuring it clicks securely into place.
- Connect Antenna: Connect the appropriate antenna to the LoRa module’s antenna connector. Ensure that it is well installed and well matched to the frequency.
- Connect Power: Connect the USB-C cable to the base board and plug it into a USB power adapter or battery.
Step 2: Install the Meshtastic Firmware (If Needed)
- Connect to Computer: Connect the WisBlock base board to your computer using the USB-C cable.
- Enter Boot Mode: The process for entering boot mode may vary slightly depending on the specific WisBlock Core Module you are using. Typically, this involves pressing and holding a button on the Core Module while powering on the device. Consult the RAKwireless documentation for your specific module.
- Use the Web Flasher:
- Open a web browser (Chrome, Edge, etc.) and go to the Meshtastic Web Flasher: https://flasher.meshtastic.org/
- Follow the on-screen prompts to connect to your device via WebSerial. You will likely need to install or update drivers if this is the first time using the Web Flasher.
- Select the appropriate firmware version for your region (e.g., “US 915,” “EU 868,”). If you do not see the Core Module in the selections, or if the flash fails, you may need to install J-Link. See the documentation on meshtastic.org for further direction.
- Click “Flash” and wait for the process to complete.
Step 3: Configure the WisBlock as a Repeater
- Install the Meshtastic App: Download and install the Meshtastic app on your Android or iOS device from the app store.
- Enable Bluetooth: Make sure Bluetooth is enabled on your mobile device.
- Open the Meshtastic App: Launch the Meshtastic app.
- Connect to the Device: The app should automatically detect your WisBlock. If not, tap the “+” icon and select your device from the list.
- Configure Node Settings (Repeater):
- The app will guide you through the initial setup. You can set a device name (e.g., “Repeater1,” “Hilltop Repeater”), assign a location (optional), and configure other basic settings.
- Set Device Role to Repeater: This is the crucial step. Within the app, navigate to the device settings and set the device role to “Repeater”. This tells the node to passively rebroadcast all messages it receives.
- For some unattended situations you may wish to have “Ghost Nodes” to avoid having unmanaged systems that are public.
- A note that repeaters should be close to Line of Sight.
Step 4: Verify Repeater Functionality
- Place the Repeater: Position the WisBlock repeater node in a strategic location that provides good coverage for your network. This often means a high vantage point with minimal obstructions.
- Test Communication: Use two other Meshtastic nodes to test communication through the repeater. Send messages between the two nodes, ensuring that the repeater successfully relays the messages even when the devices are not able to reach each other directly.
- Monitor Node Status: Use the Meshtastic app to monitor the status of your repeater node, including signal strength, battery level (if applicable), and the number of packets relayed.
Step 5: Advanced Configuration (Optional)
- Power Optimization: If using battery power, experiment with different transmit power settings and duty cycles to optimize battery life.
- Channel Settings: If you’re using custom channels, ensure the repeater node is configured to use the same channels as other nodes in your network.
Set Up RAKwireless WisBlock as Ghost Repeater
Important Considerations Before Proceeding:
- Legality: Before implementing ghost node features, thoroughly research and understand the legal implications in your region. Some jurisdictions may have regulations regarding the use of hidden or stealth communication devices.
- Ethical Use: Use ghost node features responsibly and ethically, only for legitimate purposes such as authorized security operations, wildlife tracking, or emergency communication in situations where visibility is a concern.
Prerequisites:
- RAKwireless WisBlock Base Board (RAK5005-O)
- RAKwireless WisBlock Core Module (e.g., RAK4631)
- RAKwireless WisBlock LoRa Module (e.g., RAK3172)
- Antenna compatible with your LoRa module (915 MHz for USA)
- USB-C cable
- Computer with internet access
- Android or iOS mobile device (for Meshtastic app)
- Power source (USB power adapter or battery)
- Suitable, discreet enclosure (optional, for hiding the device)
Step 1: Assemble the WisBlock
- Mount Core Module: Carefully attach the RAK4631 core module to the RAK5005-O base board. Ensure it clicks securely into place.
- Mount LoRa Module: Attach the RAK3172 LoRa module to the base board, ensuring it clicks securely into place.
- Connect Antenna: Connect the appropriate antenna to the LoRa module’s antenna connector. Ensure the antenna is compact or easily concealed.
- Connect Power: Connect the USB-C cable to the base board and plug it into a USB power adapter or battery. Consider using a battery pack for portability and easier concealment.
Step 2: Install the Meshtastic Firmware (If Needed)
- Connect to Computer: Connect the WisBlock base board to your computer using the USB-C cable.
- Enter Boot Mode: The process for entering boot mode may vary slightly depending on the specific WisBlock Core Module you are using. Typically, this involves pressing and holding a button on the Core Module while powering on the device. Consult the RAKwireless documentation for your specific module.
- Use the Web Flasher:
- Open a web browser (Chrome, Edge, etc.) and go to the Meshtastic Web Flasher: https://flasher.meshtastic.org/
- Follow the on-screen prompts to connect to your device via WebSerial. You will likely need to install or update drivers if this is the first time using the Web Flasher.
- Select the appropriate firmware version for your region (e.g., “US 915,” “EU 868”). If you do not see the Core Module in the selections, or if the flash fails, you may need to install J-Link. See the documentation on meshtastic.org for further direction.
- Click “Flash” and wait for the process to complete.
Step 3: Configure the WisBlock as a Ghost Repeater
- Install the Meshtastic App: Download and install the Meshtastic app on your Android or iOS device from the app store.
- Enable Bluetooth: Make sure Bluetooth is enabled on your mobile device.
- Open the Meshtastic App: Launch the Meshtastic app.
- Connect to the Device: The app should automatically detect your WisBlock. If not, tap the “+” icon and select your device from the list.
- Configure Node Settings (Repeater & Ghost):
- The app will guide you through the initial setup.
- Set the device role to “Repeater”. This tells the node to passively rebroadcast all messages it receives.
- Hide: First, find a location away from any casual eyes. A good hidden spot can be the first and best defense against nefarious people.
- Settings: In order to turn off certain functions and features, go to the app or connect via computer and then go to:
- Short Name : Disable “Show short name on device list”
- Encryption: Turn on encryption for everything.
- GPS: GPS for node is disabled
- GPS Broadcast: Broadcast is disabled
- GPS Status: Change the GPS Status screen update rate from rapid or real-time to “Never Update”.
- Power Saving Mode: Use the documentation to ensure that you have the max settings set.
- Remove Display: Disconnecting the onboard or adding an external display will make the device more difficult to detect.
- Consider completely removing the Bluetooth functionality.” This will make the app connections difficult, requiring either the need to have to directly flash, but will add greatly to stealth capabilities.
Step 4: Verify Repeater Functionality
- Placement: Find a suitable, discreet location for the repeater. This might involve hiding it within an existing object or structure or placing it in a location that is difficult to access.
- Test Communication: Use two other Meshtastic nodes to test communication through the repeater. Send messages between the two nodes, ensuring that the repeater successfully relays the messages even when the devices are not able to reach each other directly.
Step 5: Monitor Power and Performance.
- Monitor Node Status: It will require constant monitoring and possible debugging, without direct connection. Check regularly!
By following these steps, you can effectively set up your RAKwireless WisBlock as a repeater node with ghost node features, maximizing its stealth capabilities. Remember, always prioritize responsible and ethical use, and be sure to comply with all applicable regulations.
Troubleshooting
When troubleshooting your Meshtastic devices and network, it’s always good to start simple. Make sure all cabling, antenna, power, etc… is correct and properly fitted then try rebooting all the devices and see if all is well. If not, there are plenty of resources on the Meshtastic.org site as well as YouTube if you are a visual learner.
| Common Issue | Possible Causes | Solutions |
|---|---|---|
| No connectivity between nodes | Physical obstructions, misconfigured settings, or incorrect frequencies | Relocate nodes, check settings, verify frequency compliance |
| Weak signal or low range | Low antenna gain, poor antenna, interference, or battery issues | Use higher gain antennas, minimize interference, replace or recharge batteries |
| Nodes not appearing in network | Firmware mismatch, incorrect IDs, or hardware failure | Reflash firmware, verify IDs, test hardware components |
| Frequent disconnections | Power fluctuations, environmental factors, or hardware faults | Use stable power sources, shield equipment from weather, replace faulty hardware |
| Security breaches or unauthorized access | Weak encryption or default credentials | Enable strong encryption, change default passwords, implement network security policies |
Glossary
- Ad Hoc Architecture: A network architecture where networks are dynamically formed without pre-existing infrastructure, adjusting as nodes change.
- Amateur Radio (HAM Radio): A popular hobby and service where licensed operators can communicate using radio equipment for non-commercial purposes. Often used for experimentation, emergency communication, and public service. Requires licensing and adherence to regulations.
- Antenna Gain: A measure of how well an antenna focuses radio frequency (RF) energy in a particular direction compared to an isotropic radiator (an antenna that radiates equally in all directions). Higher gain antennas can increase range but may require more precise aiming.
- AODV (Ad hoc On-Demand Distance Vector): A routing protocol used in mesh networks where routes are established dynamically, only when data needs to be transmitted. Routes are created only when needed, reducing overhead.
- APRS (Automatic Packet Reporting System): A digital communication protocol used by amateur radio operators to transmit real-time data, such as location, weather information, and short messages. It is often used for tracking and emergency communication.
- ATAK (Android Tactical Assault Kit): A geospatial awareness and collaboration tool used in tactical and coordinated operations. Meshtastic can be integrated with ATAK using a plugin to share location and other information.
- BATMAN (Better Approach to Mobile Ad-hoc Networks): A routing protocol that focuses on simplicity and efficiency in mobile ad-hoc networks. Suitable for networks with frequent changes in topology.
- Channel (Meshtastic): A virtual communication pathway within the Meshtastic network, often used to create groups or segregate communications. Channels can be encrypted for privacy.
- Chirp Spread Spectrum Modulation: A modulation technique used in LoRa that spreads the signal over a wider bandwidth, making it more resistant to interference and allowing for longer range.
- Client Node: A Meshtastic device that is primarily used for sending and receiving messages. It typically connects to a user’s device (phone, computer) via an app or other interface. It may or may not rebroadcast messages from other nodes.
- Decentralization: The distribution of control and decision-making away from a central authority. In mesh networking, decentralization means that the network can function even if some nodes fail.
- Encryption: The process of encoding data to prevent unauthorized access. Meshtastic uses encryption to ensure the privacy of communications. Strong encryption is recommended for sensitive communications.
- ESP32: A low-cost, low-power system-on-a-chip microcontroller with integrated Wi-Fi and Bluetooth. It is often used in Meshtastic devices due to its versatility and ease of use.
- Firmware: The software that is embedded in a hardware device, controlling its basic operations. Keeping firmware up-to-date is essential for performance, security, and compatibility.
- Frequency Bands: Specific ranges of radio frequencies allocated for different purposes. Meshtastic devices operate in specific frequency bands, such as the 915 MHz ISM band in the USA.
- FSK (Frequency Shift Keying): A modulation technique that represents digital data as variations in the frequency of a carrier signal. Commonly used in LoRa modules.
- Ghost Node: A Meshtastic device configured to operate in a hidden or stealthy manner, typically used as a repeater or router without providing visual feedback or originating messages. Ethical and legal considerations are important when using ghost nodes.
- Handheld/Mobile Devices (Meshtastic): Meshtastic devices designed for portability, often with minimal stand-alone functionality and intended for use with a connected device (smartphone, computer).
- ISM Band (Industrial, Scientific, & Medical): Radio frequency bands that are reserved internationally for industrial, scientific, and medical purposes. Meshtastic devices often operate in the ISM band to avoid interference with other services.
- LoRa (Long Range): A low-power, wide-area network technology used for long-range communication. Meshtastic leverages LoRa for its ability to communicate over long distances with minimal power consumption.
- Mesh Network: A communication network where each device (node) acts as both a transmitter and a relay, allowing data to be routed through multiple paths. This creates a resilient and decentralized network that can operate without centralized infrastructure.
- Modulation Techniques: Methods of encoding digital data onto a radio frequency carrier signal for transmission.
- Multi-hop Routing: A method of routing data packets in a mesh network where packets hop from one node to another until they reach their destination, extending the network’s range. This allows for communication beyond the direct range of individual nodes.
- Node: A device in a mesh network that can transmit, receive, and relay data. Each node contributes to the overall connectivity and range of the network.
- OEM (Original Equipment Manufacturer): The original manufacturer of a device or component. Always refer to OEM documentation for accurate information and instructions.
- OLSR (Optimized Link State Routing): A routing protocol used in mesh networks where each node maintains a complete view of the network topology. This allows for efficient routing decisions but can be more complex to implement than other protocols.
- Omnidirectional Antenna: An antenna that radiates radio frequency (RF) energy in all directions. Ideal for general coverage and mobile nodes.
- PKSs (Pre-Shared Keys): Secret keys that are shared between devices to encrypt communication.
- PSK (Pre-Shared Key): A secret key that is shared between two or more parties and used for encryption or authentication. Essential for securing Meshtastic networks.
- RAKwireless WisBlock: A modular hardware system that allows users to easily create custom IoT devices by connecting different modules together. It is often used in Meshtastic projects for its flexibility and ease of prototyping.
- Redundancy: The inclusion of extra components or systems to provide backup in case of failure. In Meshtastic, redundancy can be achieved by deploying multiple nodes to ensure coverage and reliability.
- Resilience: The ability of a network to maintain connectivity even when some nodes fail or are disrupted. Mesh networks are inherently resilient due to their decentralized nature.
- Repeater Node: A Meshtastic device that is configured to rebroadcast messages, extending the range of the network. Repeaters do not typically originate messages themselves.
- Router Node: A Meshtastic device that is configured to rebroadcast messages and is visible in the Nodes list. Routers help to distribute network traffic and extend coverage.
- Self-Healing: The ability of a mesh network to automatically reroute data when a node fails or moves, maintaining connectivity. This ensures that the network can adapt to changing conditions.
- Stationary Devices (Meshtastic): Meshtastic devices that are intended for fixed locations, such as on a roof or in a building. Often used as repeaters or routers to extend network coverage.