Alternator Replacement 2011 Kia Sedona
Step-by-Step Guide: Replacing the Alternator on a 2011 Kia Sedona EX
A Comprehensive DIY Tutorial for Replacing Your Alternator
Introduction
This guide provides a detailed, step-by-step breakdown for replacing the alternator in your 2011 Kia Sedona EX. Always consult your vehicle’s service manual for specific instructions and torque specifications and take appropriate safety precautions.
Tools and Materials Needed
- New or rebuilt alternator compatible with 2011 Kia Sedona EX
- Ratchet and socket set (metric). Need the 8, 10, 12, 14, and 19mm for sure.
- Wrench set (metric) I didn’t use wrenches. I used deep-well sockets, ratchet, and torque wrenches but it may be good to have them handy.
- Screwdrivers (Phillips and flathead)
- Belt tensioner tool or breaker bar
- Torque wrench
- Gloves, ear plugs, and safety glasses
- Wheel Chocks, etc.…
- Battery terminal puller (optional but helpful)
- Shop towels and hand cleaner
- Service manual (recommended)
Preparation and Safety
Always consult your owner’s manual for important safety information
Park safely: Park the vehicle on a flat, level surface, engage the parking brake, and remove the keys from the ignition.
Use wheel chocks, or other suitable apparatus to secure the vehicle and keep it from rolling.
Disconnect the battery: Open the hood and disconnect the negative (black) battery cable first to prevent accidental short circuits. You may use a battery terminal puller if terminals are tight.
Allow the engine to cool: If you’ve recently run the engine, wait for it to cool before working under the hood.
Take lots of pictures and/or video, even narrating what’s going on… before, during, and after the replacement can help you.
Read through this documentation all the way before you attempt the repair, then you can follow through again as you proceed and have a good grasp of the tips and tricks.
NOTE: Always double-check if you think your vehicle may be different from the resources in this document. If in doubt, please contact a qualified professional. This is for educational purposes only. Always observe any and all OEM resources as they supersede anything in our content.
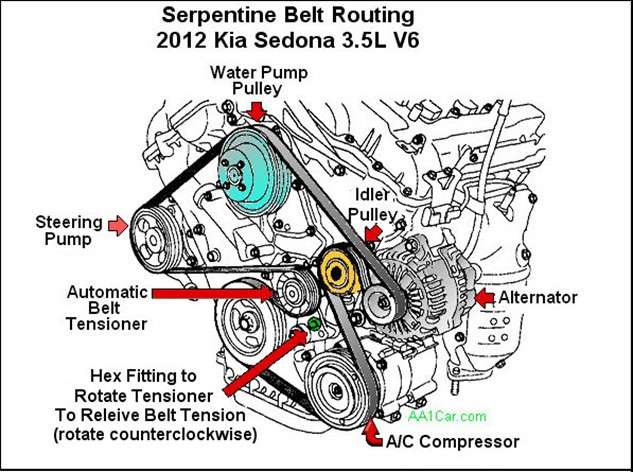
Step 1: Locate the Alternator
Identify the belt routing diagram
usually found under the hood or in the owner’s manual. Take a clear photo or draw your own if needed. An example that matches my vehicle is shown here:
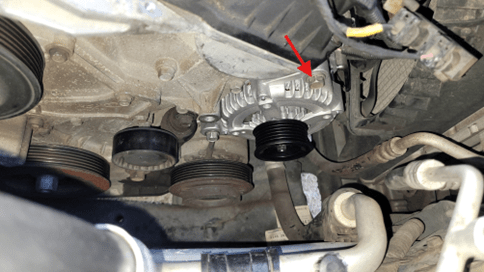
IMPORTANT NOTE: be careful of other wiring harnesses, fittings, lines, etc. especially the AC compressor clutch wires just under the alternator:
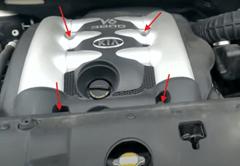
Remove the engine cover
if it blocks access to the alternator and belt, etc.… The one shown (left) has 4 10mm bolts securing it. My cover (right) did not require removal.
The alternator is mounted on the front of the engine, on the passenger side. It is driven by the serpentine belt.
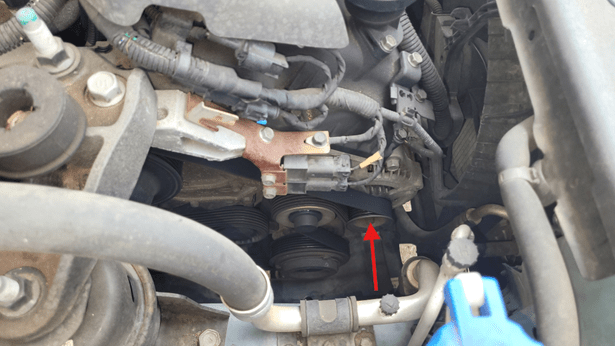
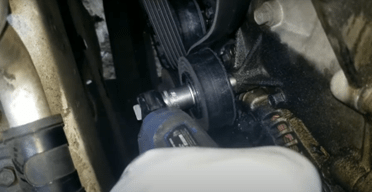
Step 2: Remove the Serpentine Belt
Locate the belt tensioner.
Use a belt tensioner tool or a breaker bar to rotate the tensioner hex fitting and relieve tension on the belt (counterclockwise).
IMPORTANT NOTE: The hex fitting for the 19mm deep-well socket is a hexagonal protrusion cast into the tensioner assembly. The bolt head visible from the top is the pivot bolt and should not be removed or adjusted.
While holding the tensioner, slide the serpentine belt off the alternator pulley. Carefully release the tensioner back to its resting position, taking care not to pinch your hands, etc…
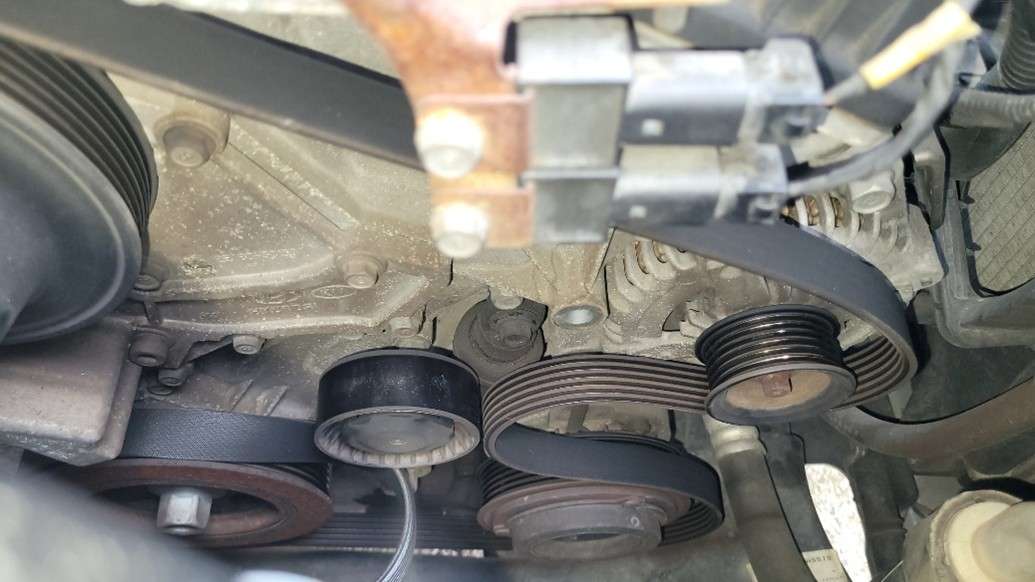
Inspect the belt and pulley for cracks or wear.
Consider replacement(s) if signs of damage, excessive wear, etc… are observed.
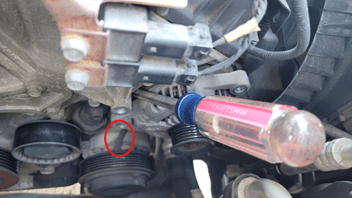
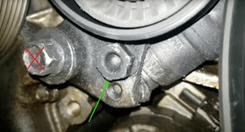
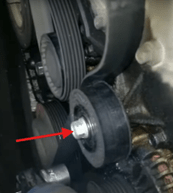
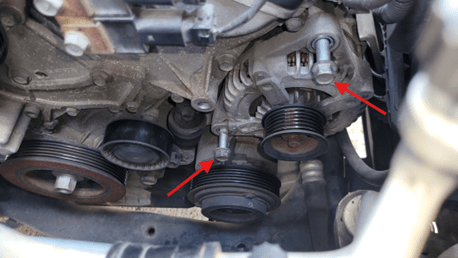
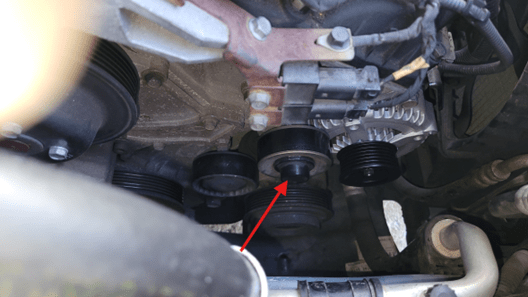
Step 3: Remove the Tensioner Idler Pulley
Locate and carefully remove the plastic center cap
that covers the idler pulley mounting bolt. Use a 14mm Socket to remove the pulley. This will allow access to the back alternator mounting bolt.
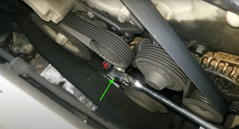
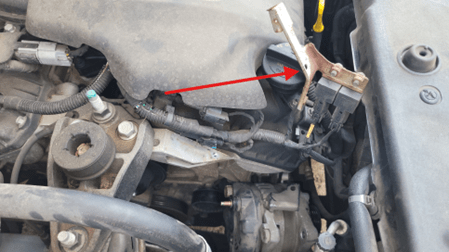
Step 4: Remove Grounding/Mounting Fixture
Locate and remove the 8mm bolt
securing the grounding/connector bracket to the engine.
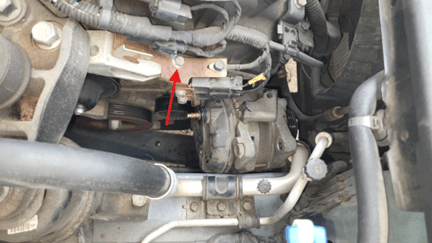
Move the bracket back and away and secure if necessary, so it won’t interfere.
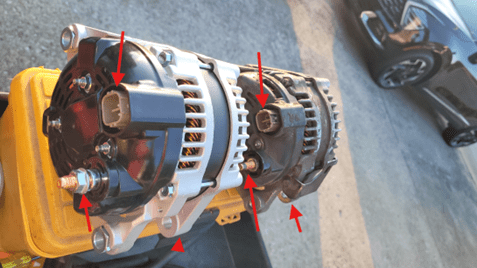
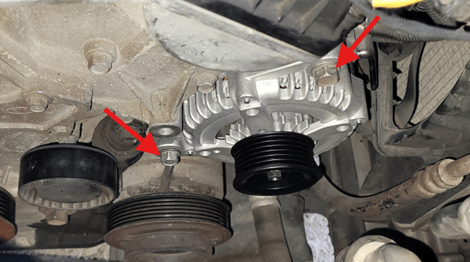
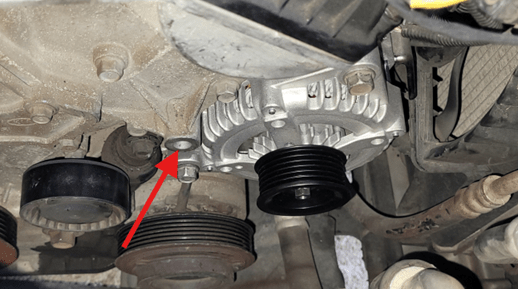
Step 6: Remove Alternator Mounting Bolts
NOTE: These electrical connections are easier to get to once the alternator is free but EXTREME CAUTION must be exercised so as not to damage the connections on the harness (or the new alternator) or any surrounding wiring and components.
Locate and remove
the 2 identical 14mm bolts securing the alternator to the engine bracket.
Support the alternator
with one hand while removing the last bolt, as it may be heavy or awkward to hold. Gently pry the alternator forward.
Carefully position the alternator so you can access the rear of the unit, being careful of the wiring and connectors, so we can disconnect the connections in the next step.

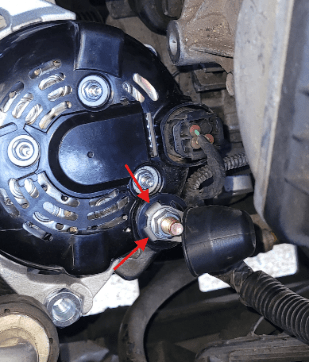
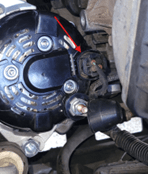
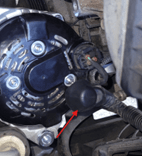
Step 5: Disconnect Electrical from the Alternator
Remove/fold back the plastic cover
from the back of the alternator
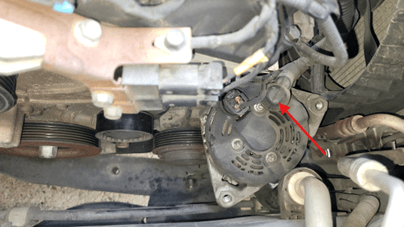
PRO TIP: That little rubber thingy will drive you absolutely mad. Don’t damage it. Use some tape or a wire tie to hold it back down on the wire until you are ready to snap it back on.
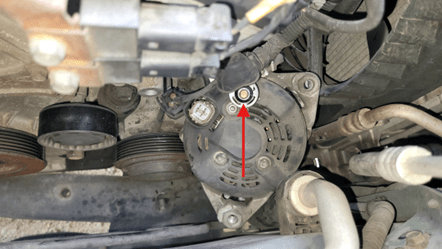
Loosen and remove the nut
securing the main power cable (B+ terminal) to the alternator using the appropriate socket or wrench, being careful not to twist the stud.
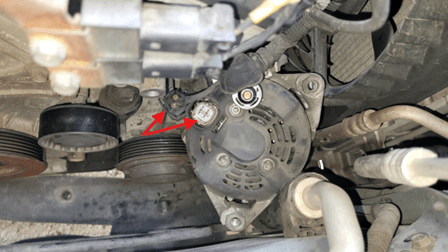
Disconnect the electrical connector
from the alternator. It has a locking tab that must be pressed or lifted before unplugging.
Move all electrical wires out of the way
to prevent damage during removal.
Carefully lift the alternator out
of the engine bay. You may need to maneuver it around hoses or other components. Be patient and avoid forcing it.
Step 8: Prepare and Inspect the New Alternator
Compare the new alternator to the old unit
ensuring mounting points and electrical connections match. Switch over any brackets/hardware from the old unit if the new unit is not equipped. I had to move the wiring harness bracket onto the new alternator.
If your new alternator has any shipping plugs or covers, remove them before installation.
Insert the bottom bolt into the alternator and get it started
(before you fish it back down to the install location). There is a slot for it to drop in, then you can just swing the unit up to engage the top bolt.
Step 9: Reconnect Electrical Connections
Position the new alternator
in the engine compartment like it was when you removed the alternator connections in a previous step.
Reconnect the main power cable
to the B+ terminal and ensure the tabs of the wire terminals are oriented with the plastic spacer or poor connection and part damage could occur.
Once the terminal tabs are properly seated, tighten the nut to factory spec (4.17~ 5.83 lb-ft). Do Not Overtighten!
Plug in the electrical connector
until you hear and feel a click.
Replace any covers,
strain reliefs, etc…that were removed earlier.
Step 10: Reposition and Reinstall the New Alternator
Place the new alternator into final position
aligning the bottom bolt in the bottom mounting slot. It should mate up easily, a new alternator will not be sprung so it should not require too much elbow grease. Take care of the wiring and connections, etc… as you manipulate it.
Rotate the unit up
to gain top bolt alignment, taking care not to cross thread.
Insert the top mounting bolt
and tighten both bolts by hand as much as possible to prevent, and possibly detect, cross-threaded hardware, etc.
Using a torque wrench, tighten the 2 mounting bolts
to the manufacturer’s recommended specification. See the service manual for torque values. I found a range I believe to be correct for my year model: (19.5-24.6 lb-ft)
Step 11: Reinstall The Idler Pulley
Hand thread the idler pulley shoulder bolt
through the pulley into the block and make sure it is not cross-threaded or that any wires, etc… are pinched around/beneath it.
Tighten to the torque spec in the service manual for your vehicle. I found a value I think is correct for my year model: 47 lb-ft
Replace the cover
making sure it is secure and in good condition.
Step 12: Reinstall Grounding/Mounting Fixture
Reposition the grounding/mounting fixture
and secure the bracket to the engine with the 8mm bolt.

Step 13: Reinstall the Serpentine Belt
Route the serpentine belt
according to the diagram or your notes.
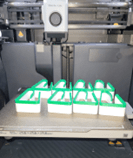
PRO TIP: I 3D printed some of these (the 25mm ones) to hold the belt on the pulleys as I routed the belt around to help hold everything in place. It wasn’t perfect, but it helped.
Use the belt tensioner tool or breaker bar to rotate the tensioner (counterclockwise again) and slip the belt over the alternator pulley. Watch those fingers (and for knuckle busters)!
Slowly release the tensioner, ensuring the belt is properly seated on all pulleys (alternator, power steering, A/C, crankshaft, etc.).
Double-check the belt’s alignment, path, and fitment and that it is tensioned.
Step 14: Reconnect the Battery and Test
Reconnect the negative battery cable
and tighten the terminal to spec. Somewhere around 4.2~5.8 lb-ft seems to be a good range.
Start the vehicle and observe the dashboard warning lights.
The battery and charging system lights should turn off after starting.
Use a multimeter to check the voltage at the battery terminals.
With the engine running, you should measure between 13.5 and 14.7 volts, indicating the alternator is charging properly.
Listen for any unusual noises
such as belt squeal, and verify all accessories are working as expected.
Troubleshooting and Tips
- Be sure to remove the negative battery terminal and secure the vehicle again before troubleshooting.
- If the battery light remains on or voltage is below normal, double-check all connections, belt routing, and mounting bolts.
- If you hear rattling or knocking, ensure the alternator is fully secured and the belt is routed correctly.
- Always use the recommended safety equipment and procedures and work in a well-ventilated area.
- If you encounter unexpected difficulties, consult a repair manual or seek assistance from a professional mechanic.
Final Checks and Cleanup
- Ensure all tools and materials are removed from the engine bay.
- Close and secure the hood.
- Dispose of the old alternator according to local regulations; many auto parts stores offer recycling or a core refund.
- Wash your hands thoroughly and store your tools properly for future use.