Serving Middle TN for over 20 yrs.

Fill out the form below to get your free initial consult

    📩 Contact Tech Bravo

    Complete the form below and we'll get back to you shortly.


    Serving Middle TN for over 20 yrs.

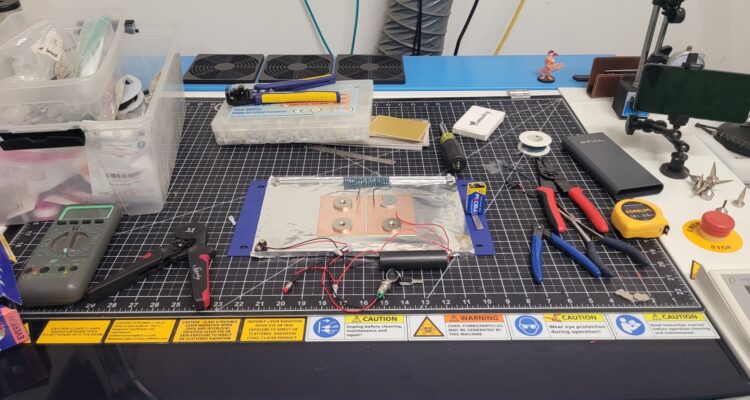
    N2 TEA Laser Build – Part 1: What Is That?

    The workbench is getting weird this week. (Yes, that’s my Thunder Laser engraver, I know, I know—it’s not supposed to be a workbench! 😅) This is the first in a series of posts where I break down the science and build a ‘Trophy-Worthy’ high-voltage device. I’ve got steel, copper, aluminum, magnets, switches, some wiring, etc..—but I’m actually building something that combines advanced physics, high-voltage power (10,000 V), and lasers! The goal is to harness the fastest electrical pulse a human can create in the lab to generate a powerful ultraviolet beam. This thing is cool and you will either walk out of school with a science trophy in your hand, or in handcuffs, depending on what day you bring it in 🤪… so always check with your school or organization before taking a science project like this to school, etc…! STAY TUNED!!! #PhysicsFun #HighVoltage #DIYElectronics #Lasers #PulsedPower #WhatsThis  

    Intermittent Charging System Anomaly on a 2011 Kia Sedona EX – SOLVED

    This technical case study details the advanced diagnosis of a persistent, intermittent charging system failure and stalling anomaly on a 2011 Kia Sedona EX (3.5L V6). After multiple failed alternator and battery replacements, the focus shifts to finding elusive high-resistance faults in terminations, grounds, and control relays. The guide outlines a precise diagnostic strategy utilizing Thermal Imaging (TI) and specialized electrical testing to pinpoint the true cause of the chronic electrical failure.

    Soltron Electronic PCB VR Replacement

    This ia a Soltron Electronic III Display PCB from an Ergoline Soltron Chill XL70 Tanning Bed. This board has obvious thermal defects to the L5973D voltage regulator IC as well as to the trace and the board. It is rumored that this particular board is plagued with this particular issue. The entire board new is likely $800~$1000 and used ones can go for $400~700.   Here is some imagery of the affected component:           These ICs are surface mount and are soldered on the underside. Without a decent hot air soldering station, flux, solder paste, etc… you could botch the repair. Since the original chip was toast anyway, i poured the heat to it with a touch of flux and removed it. It takes patience (as well magnification in my case) but it’s not too bad, you just have to be careful not to overheat any surrounding components, etc… Then i cleaned up the pads and traces (except for the one that was not a charred crevasse in the board), applied solder paste to the clean pads, then a touch of flux and the chip settled into place (after 5 solid minutes of nudging and shifting and heating). Once it was tacked into place a made sure i had good flow everywhere, then used a single strand of some 14~12 AWG stranded and made a good repair between the leg of the IC and the pad. Here is the 1st try. It probably would have been okay… but I reworked those areas. Here is it again after rework: This board will be field tested and I will update this as needed. UPDATE: That did not fix the board. Back to board-level diag… We will keep you posted.