Repair Procedures
Removal and Installation
CAUTION:
To avoid damage, unplug the wiring connectors carefully while holding the connector portion.
NOTE:
Mark all wiring and hoses to avoid misconnection.
1. Disconnect the battery negative terminal.
Tightening torque:
4.0 - 6.0 N.m (0.4 - 0.6 kgf.m, 3.0 - 4.4 lb-ft)
2. Remove the under cover.
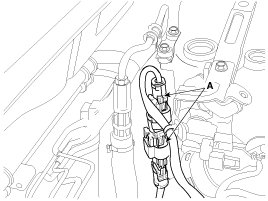
3. Disconnect the RH front, rear oxygen sensor connector (A).
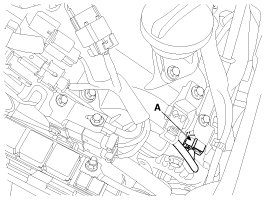
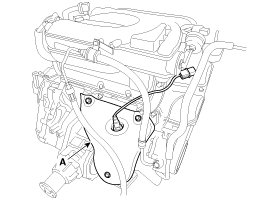
4. Disconnect the LH front oxygen sensor connector (A).
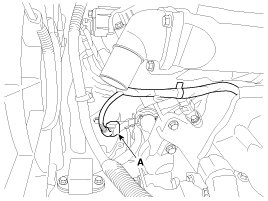
5. Disconnect the LH rear oxygen sensor connector (A).
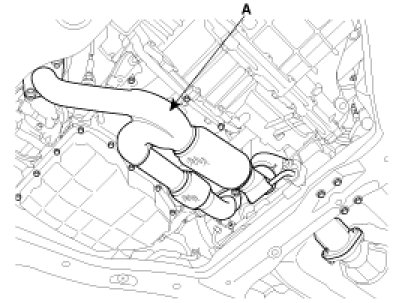
6. Remove the front muffler (A).
Tightening torque:
39.2 - 58.8 N.m (4.0 - 6.0 kgf.m, 28.9 - 43.4 lb-ft)
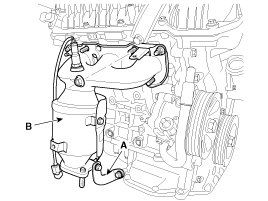
7. Remove the LH/RH exhaust manifold heat protector (A).
Tightening torque :
9.8 - 11.8N.m (1.0 - 1.2kgf.m, 7.2 - 8.7lb-ft)

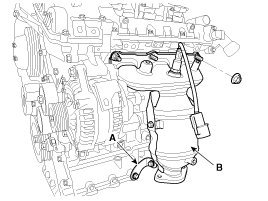
8. Remove the manifold stays (A), and then remove the exhaust manifolds (B).
Tightening torque :
Stay bolts:
24.5 - 35.3N.m (2.5 - 3.6kgf.m, 18.1 - 26.0lb-ft)
Manifold nuts :
39.2 - 44.1 N.m (4.0 - 4.5 kgf.m, 28.9 - 32.5 lb-ft)
9. Installation is reverse order of removal.
NOTE:
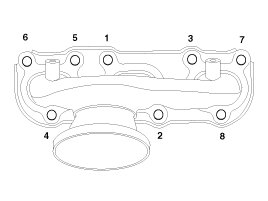
Tighten the exhaust manifold nuts in the following sequence.
[LH Bank]
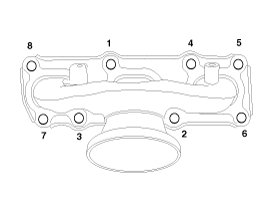
[RH Bank]